
Online appointment booking
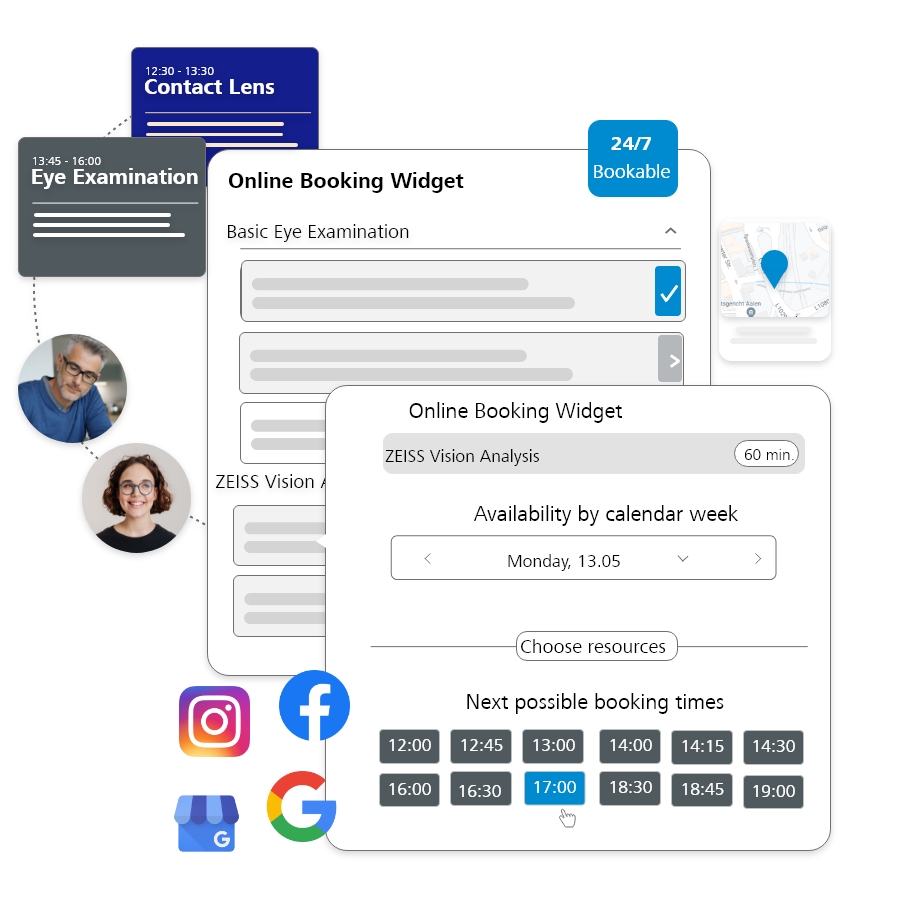
24/7 anytime, anywhere.Provide the most modern online booking solution to your customers. Offer to book your services online from all your communication channels: website, social media, Google my business page.
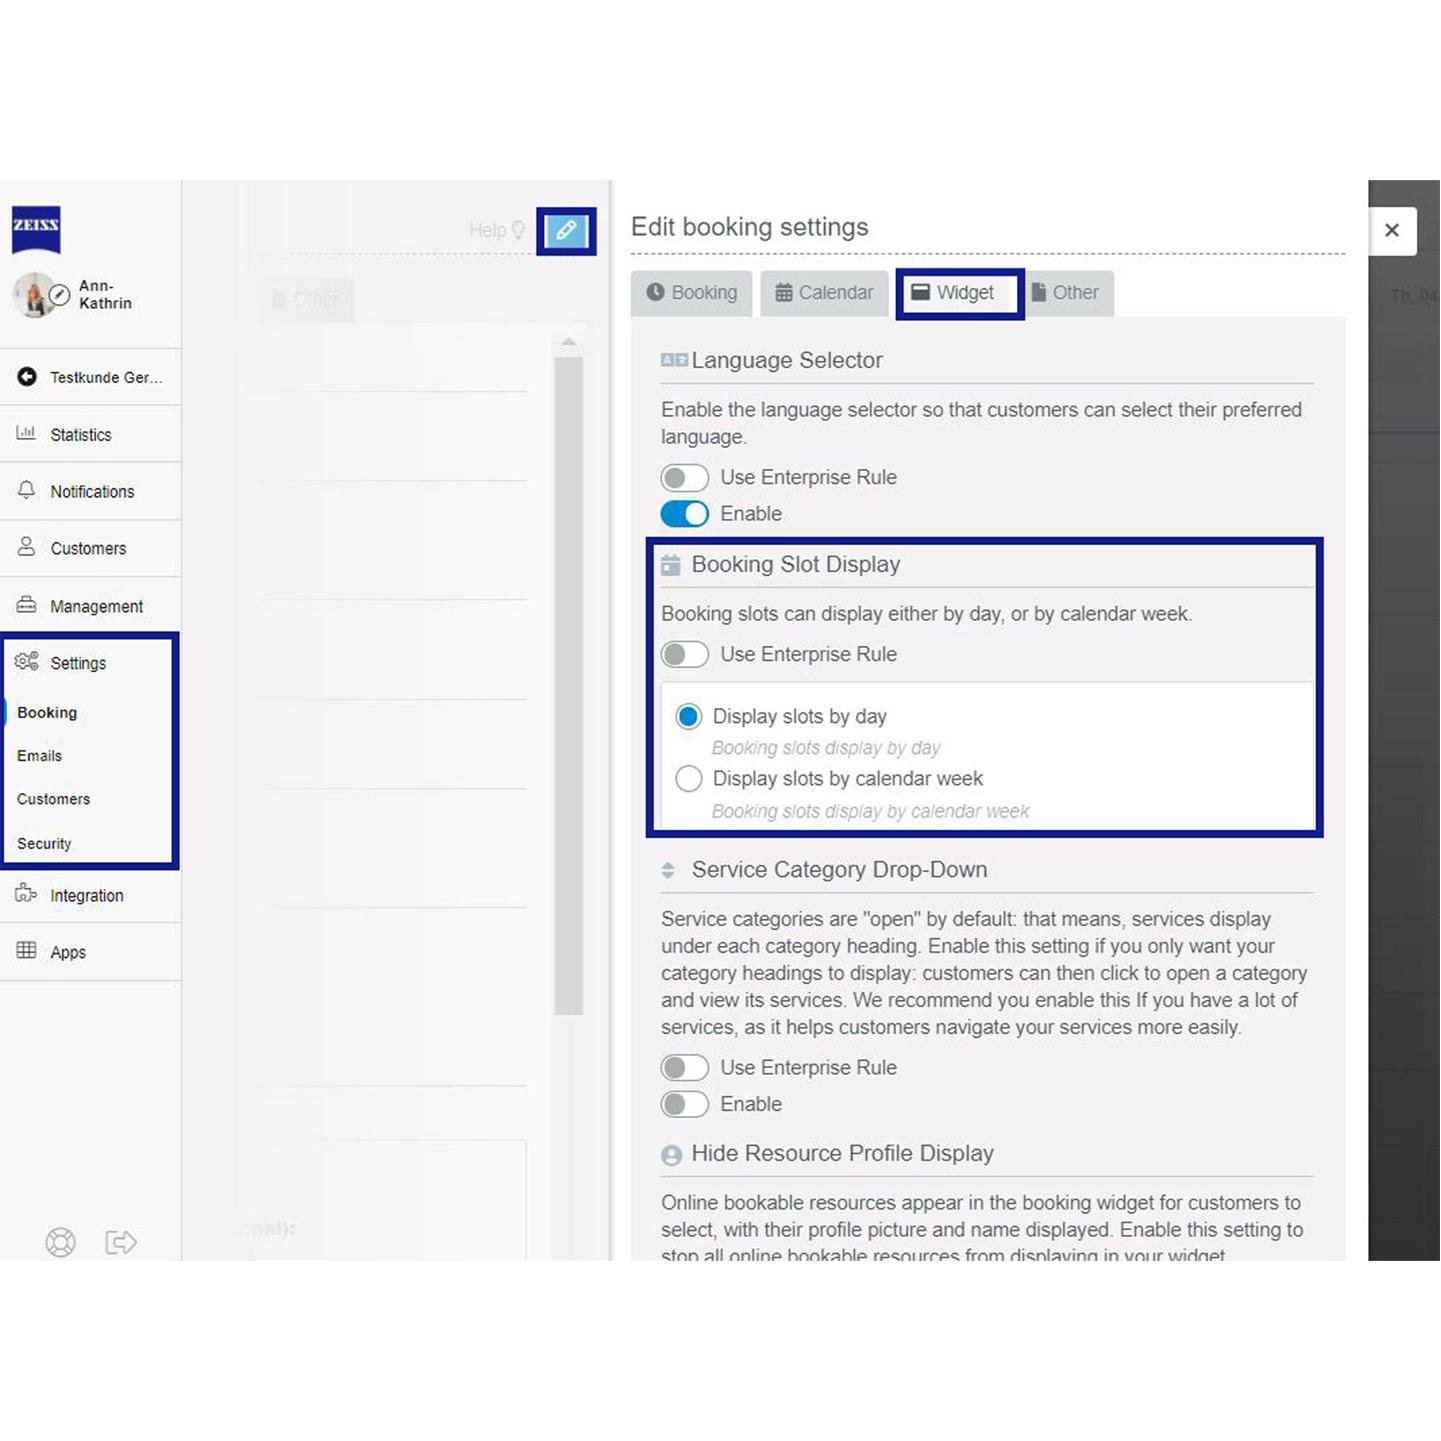

How to show your available slots in a weekly overview to your customers
- In the booking widget you can activate a weekly instead of a daily overview for your customers. This allows customers to find their desired date faster.
- You can configure this setting in the section "Booking slot display". Go to "Settings" >> "Booking" >> "Widget" tab. Enter the edit mode (pen button in the upper right corner).
- You can also activate the weekly display in the booking widget to make it very easy for your customers to see your available times.
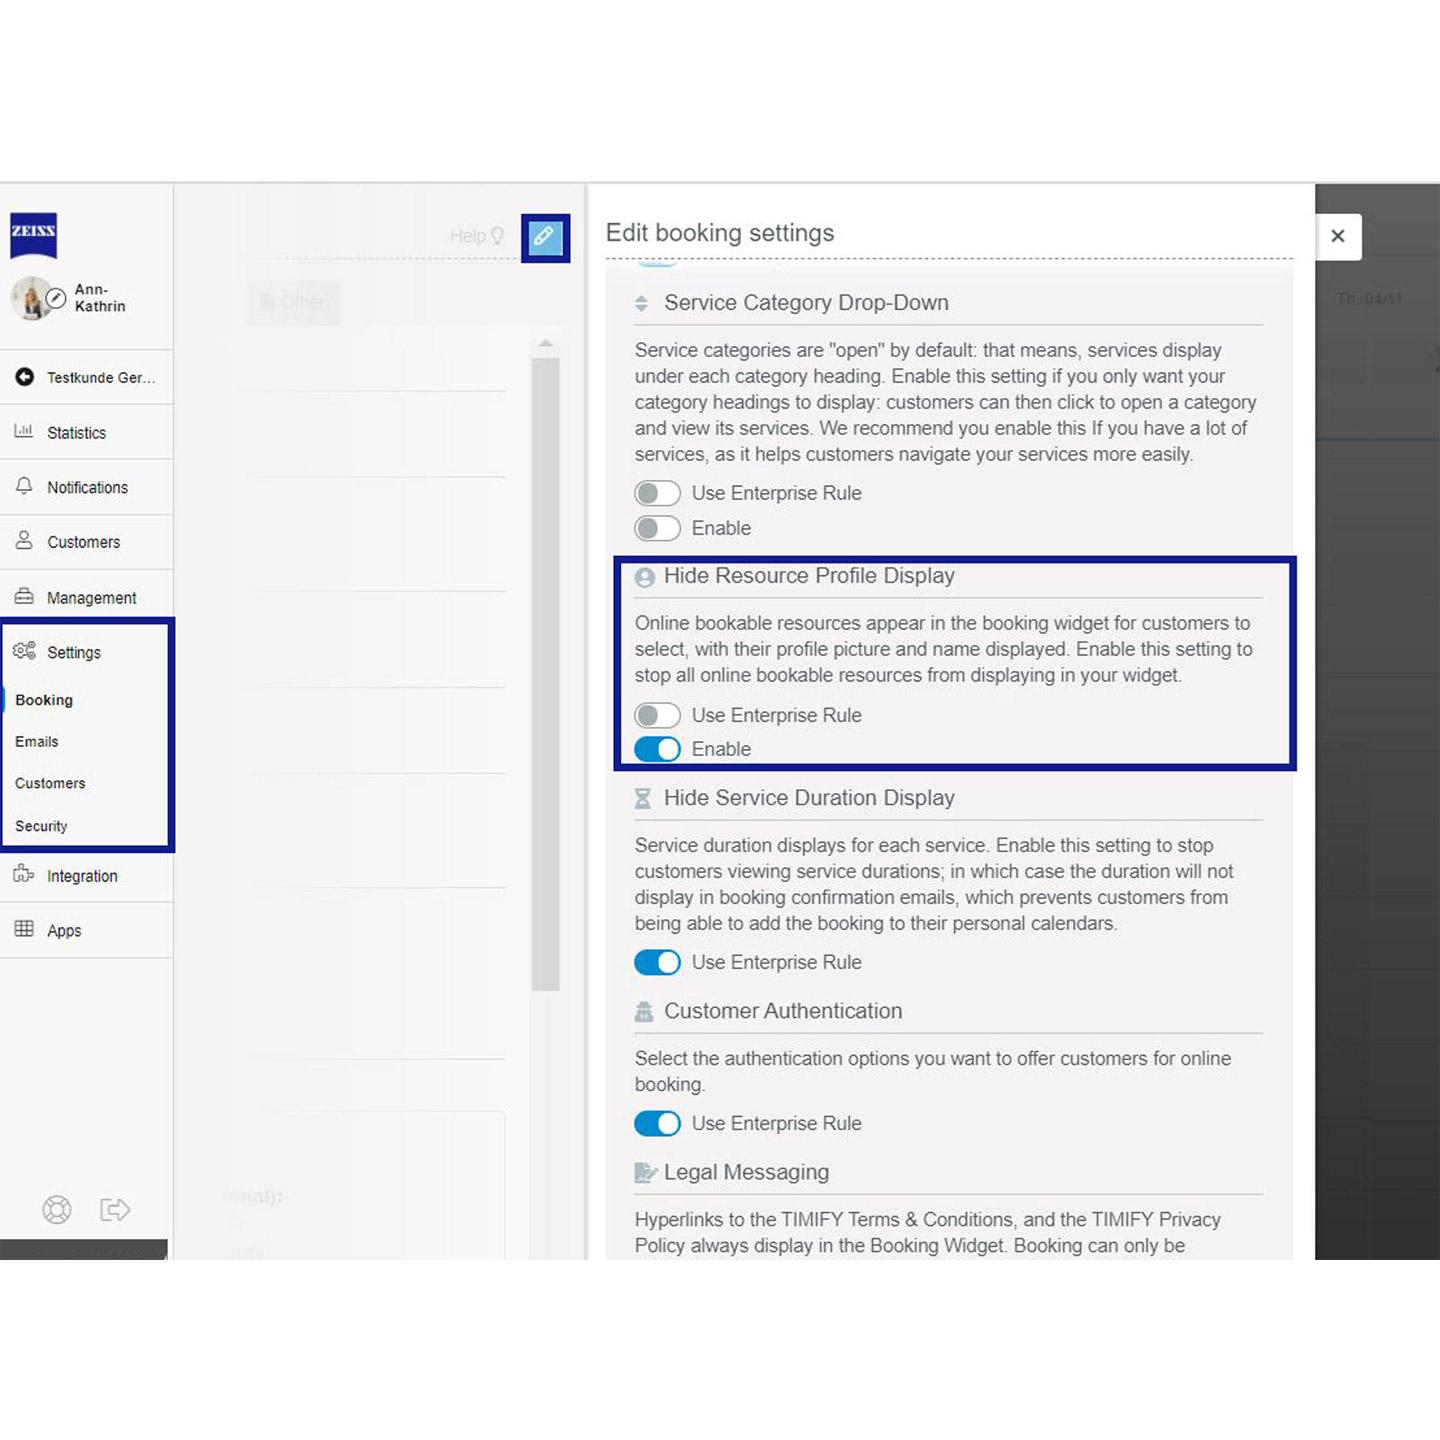

How to hide/display employees in the booking widget
- Your customer is usually shown which employee offers the selected service during an online booking. The customer can then optionally select a specific employee. The user then sees the availability of the selected employee for the desired service. If the customer does not select an employee, the system selects one at random.
- If, however, you do not want to offer your customers this option, you can easily deactivate it.
- Simply go to the section "Settings" >> "Widget" and open the editing mode (pen button).
- Here you can activate the section "Hide resource profile display", select the setting "Hide" and save this change.
- With the hide setting activated, your customers won’t see any resources in the booking process.
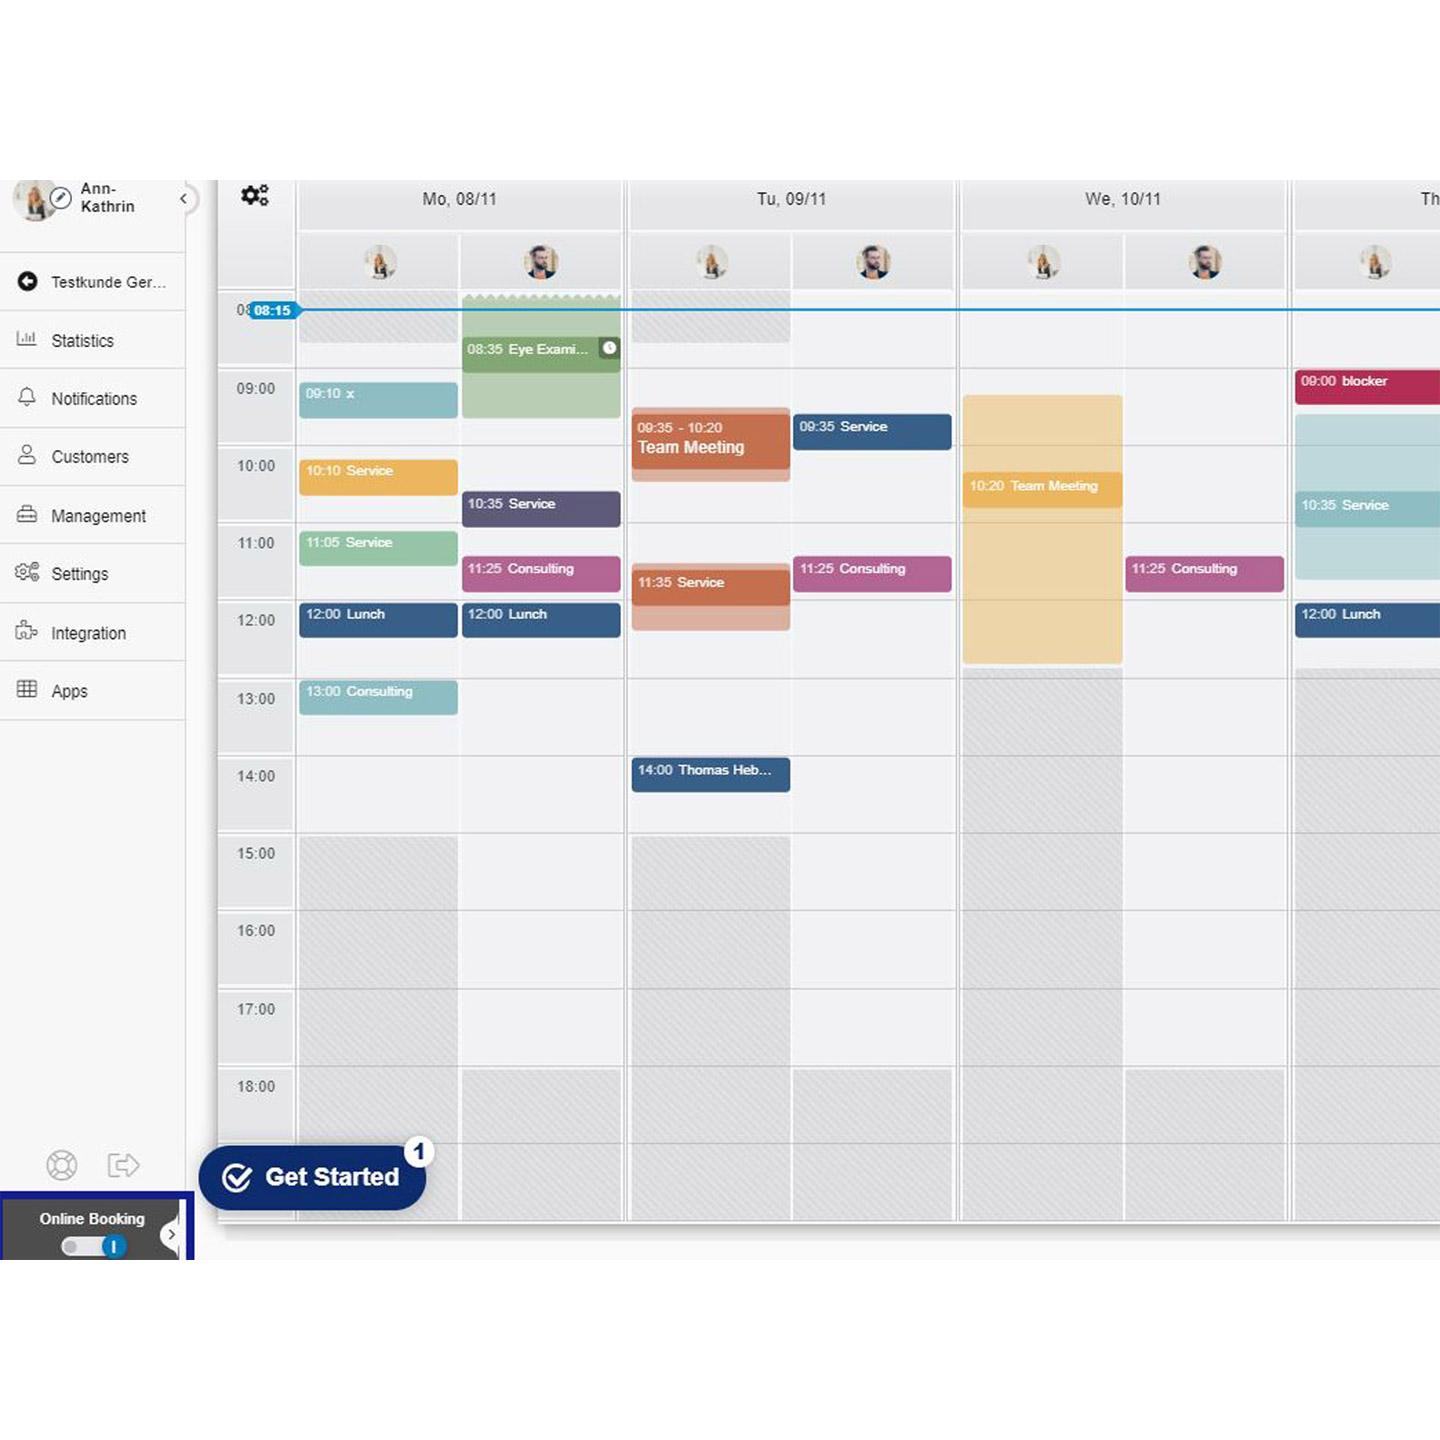

How do customers book appointments with me?
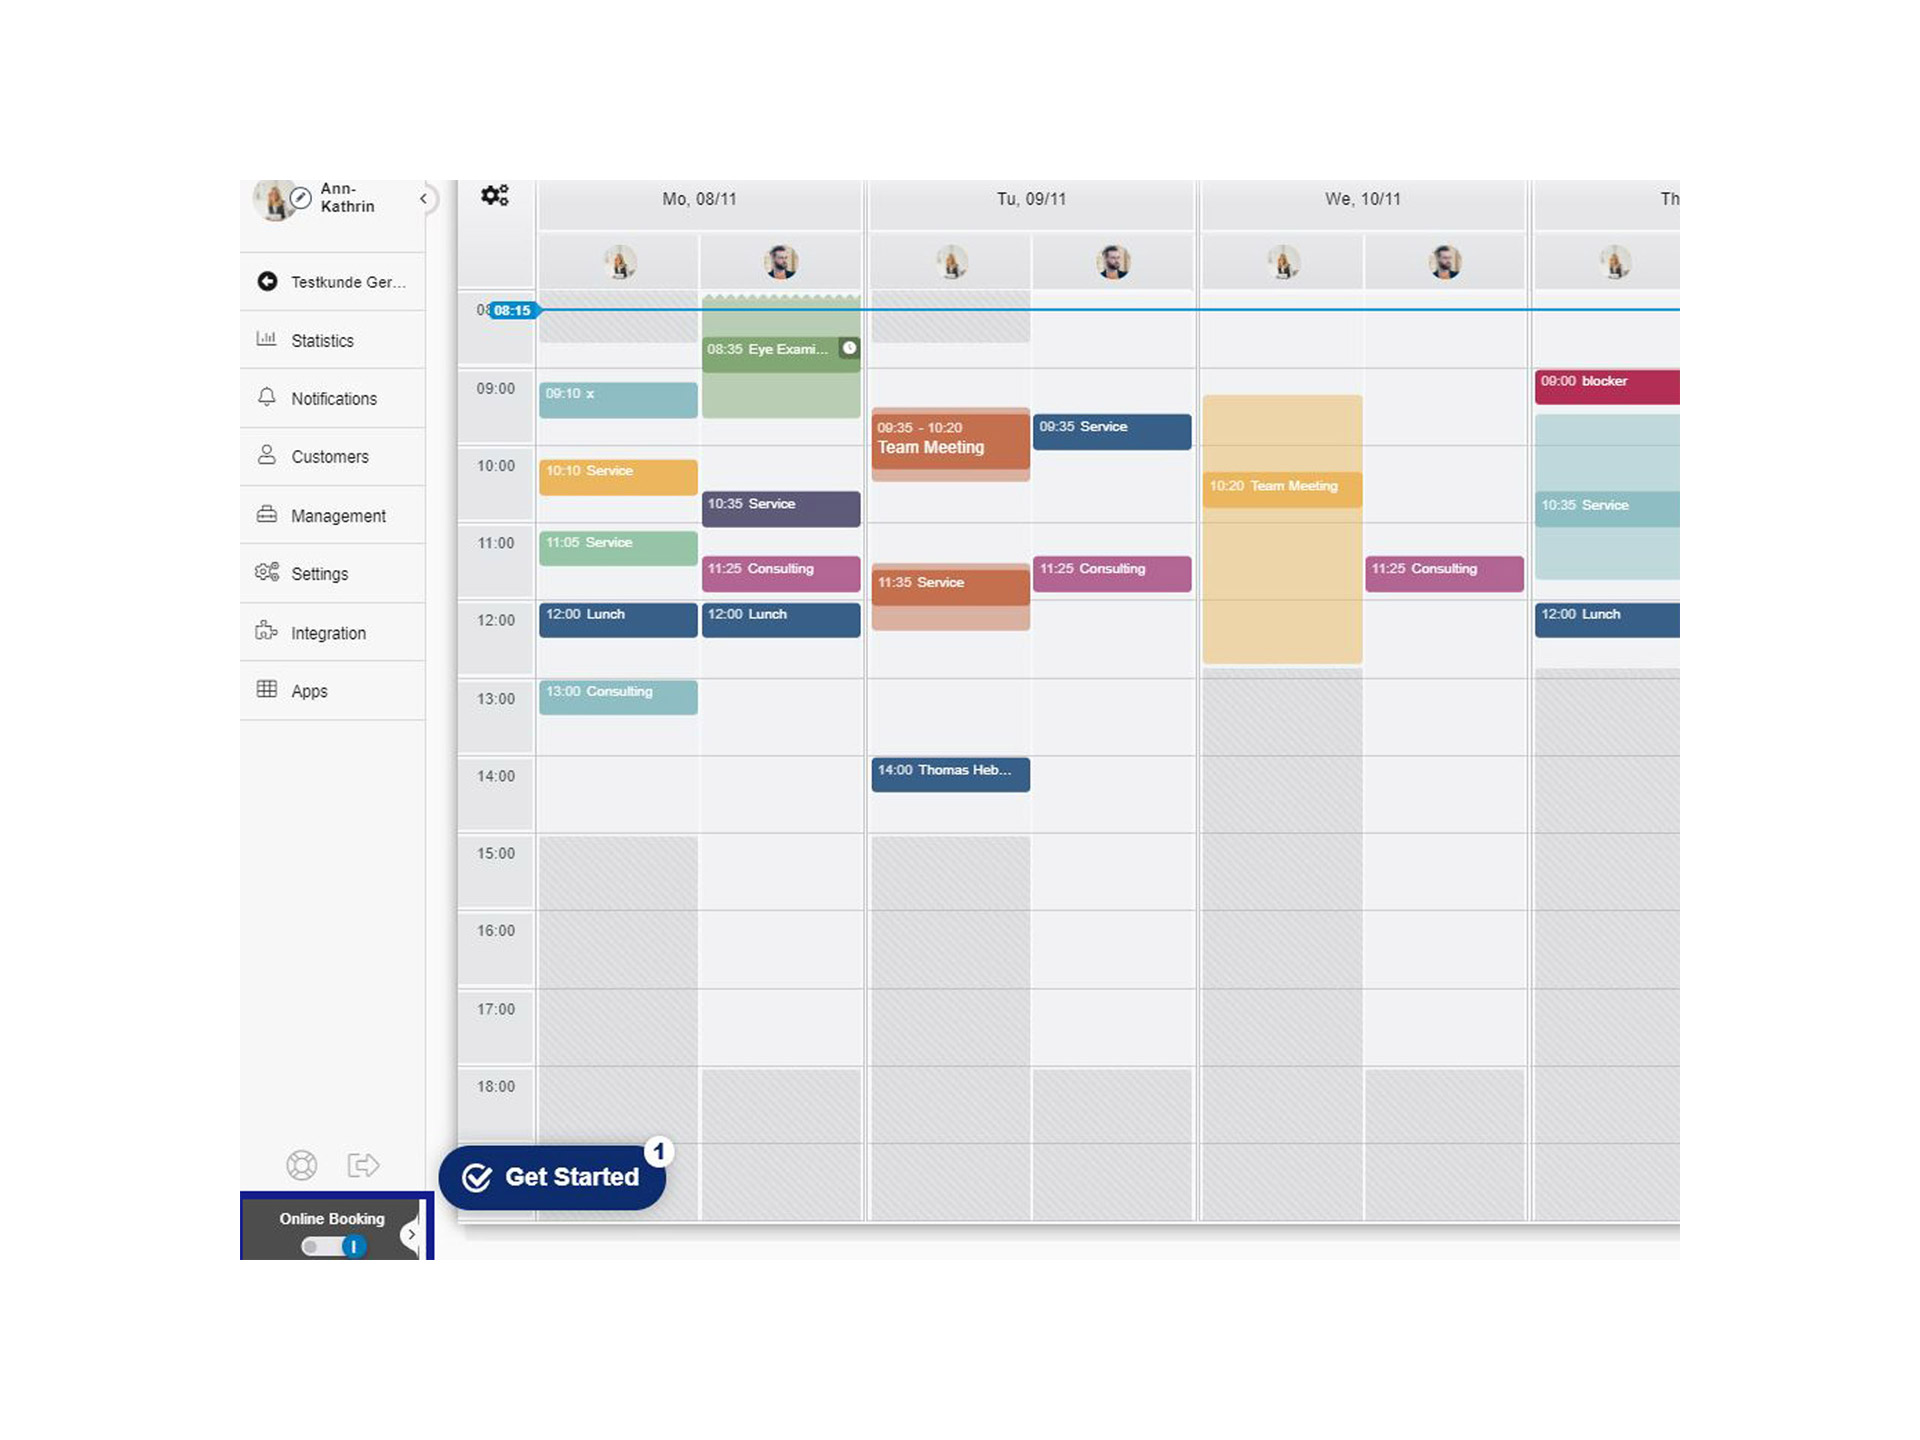
- To be able to offer your customers available dates for online booking, you must first make your ZEISS A.R.M. Platform account online bookable. You can do this by clicking the button in the bottom-left corner of your account's menu bar. As soon as the button is turned grey, the online booking is active. Please note that consumers can then also book appointments in your store via the ZEISS Store Locator.
- IMPORTANT!: Please do not forget to include and link your own Privacy Policy and Terms and Conditions in the booking settings before offering your customer this online booking experience.

Why is Online booking no longer active?
If you notice that your profile page is no longer available or the integrated booking widget is missing on your website, please check if your Online booking is activated. You can see if this is the case in your ZEISS A.R.M Platform account in the menu bar at the bottom left. If the slider Online booking is green and aligned to the right, your online booking is active. If this is not the case, click on it once and refresh the page.
What booking options are there for my customers?
In addition to booking via classic channels such as telephone, e-mail or on the website, ZEISS A.R.M Platform also offers a number of online booking options: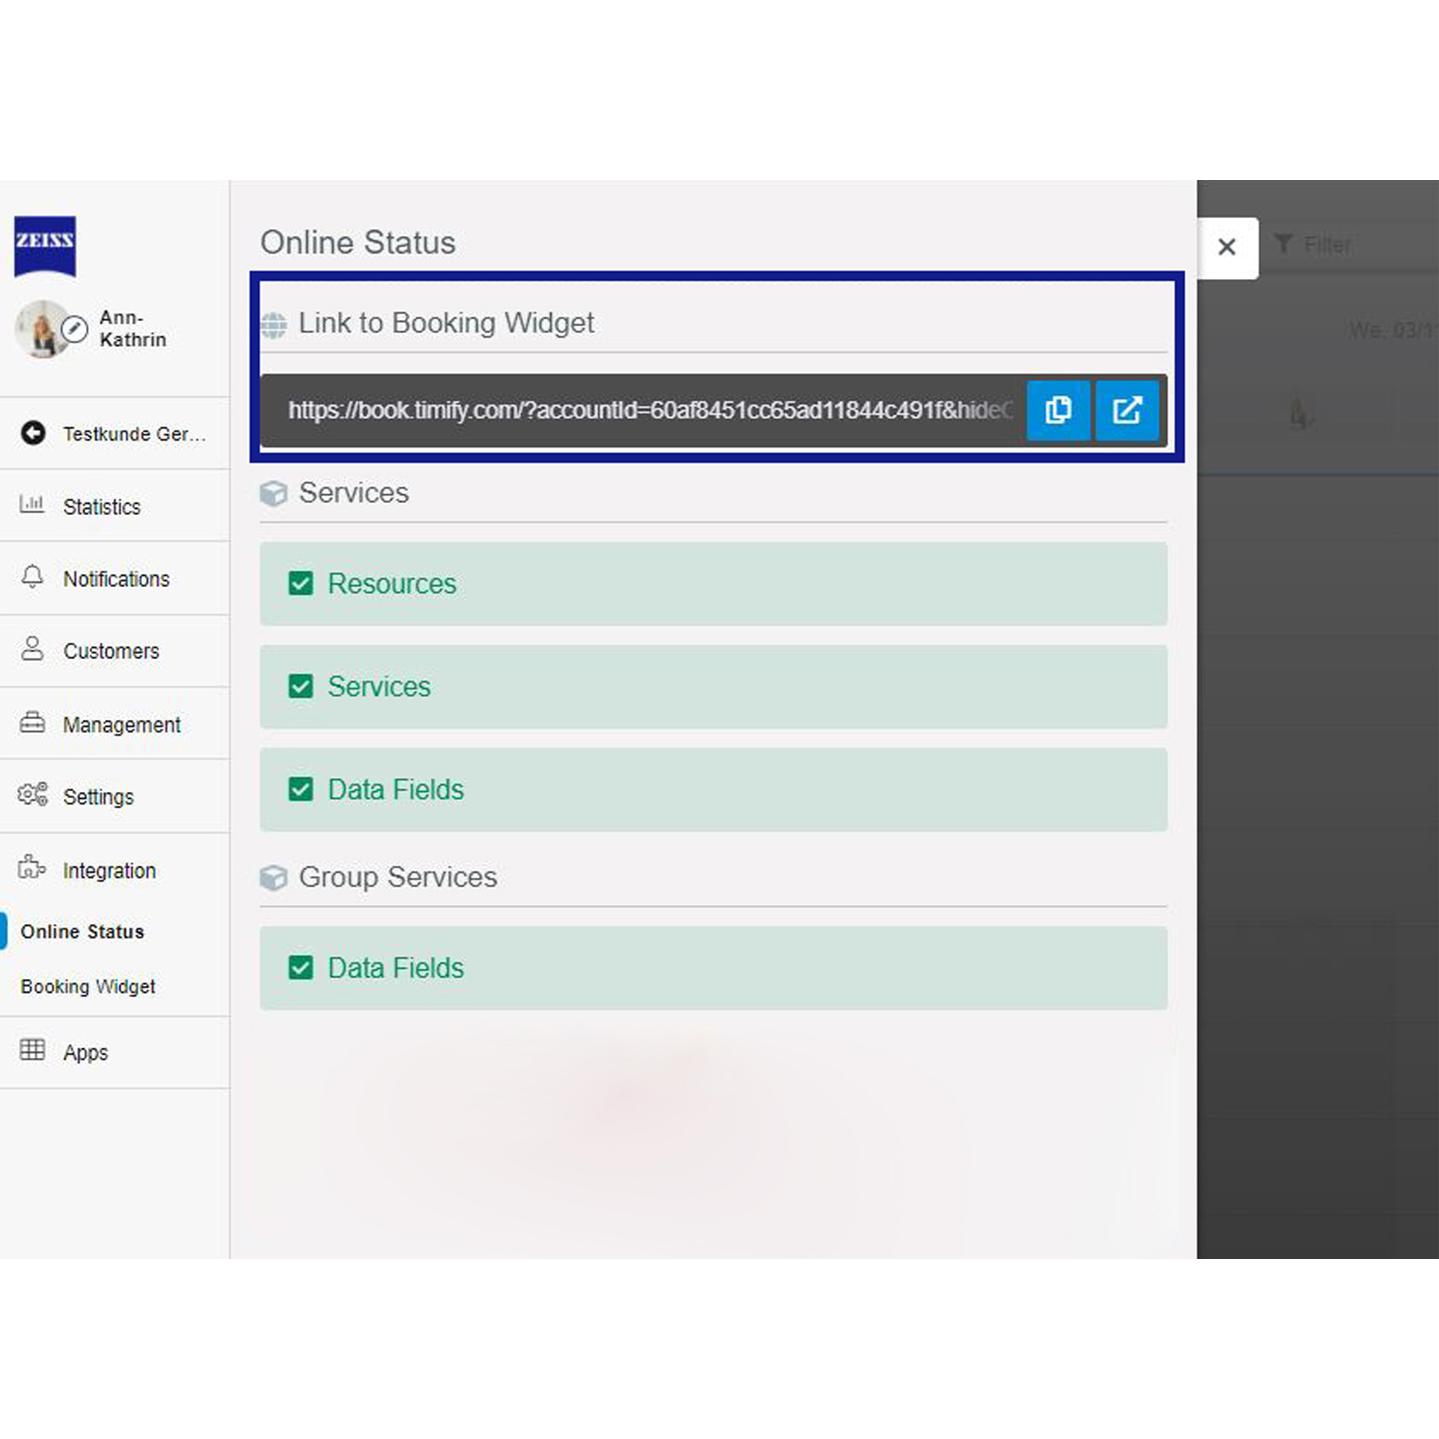

1. Using the URL (link) of the widget
- The URL of your booking widget can be included in texts or buttons on your website, social media channels or in emails. You can use the direct widget link, which will instantly display your services in the browser. This is the most direct way for a customer to access your services. To access the URL please go to "Integration" >> "Booking link" and click on the following button.
- This button will open the widget directly in a new tab.
- Tip: With the app "BookingLinks" in the ZEISS A.R.M. Marketplace you can convert the link into a QR Code and use it on print marketing material.

2. Widget integration on your website
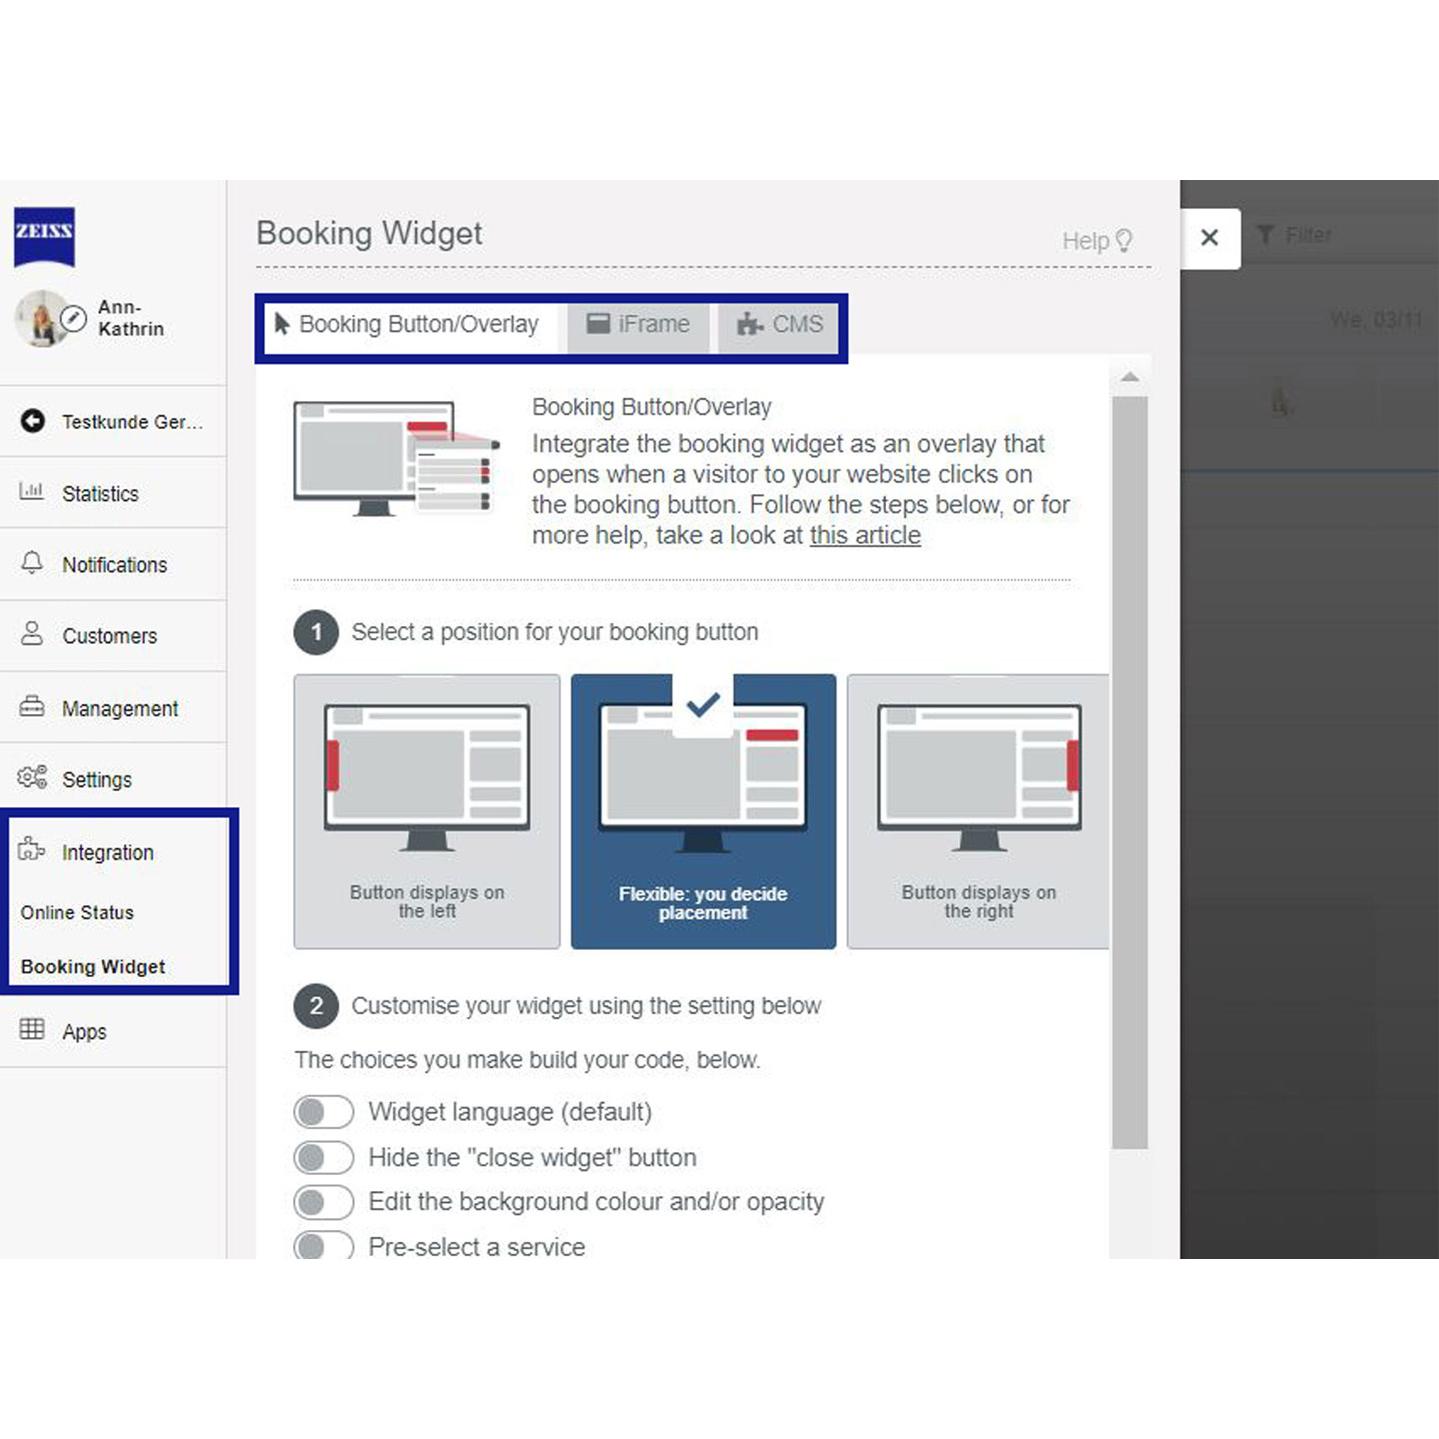
- You can also make appointments for your customers bookable online on your company's website. You can integrate the ZEISS A.R.M Platform booking button and the booking widget on your website.
- You have the option to integrate your widget as Overlay button, iFrame or you can download our TIMIFY´s plugin for WordPress, Joomla and Drupal.
- For more customisations on your booking widget ask your local customer care center.

Booking slot reservations
- Time slot selection
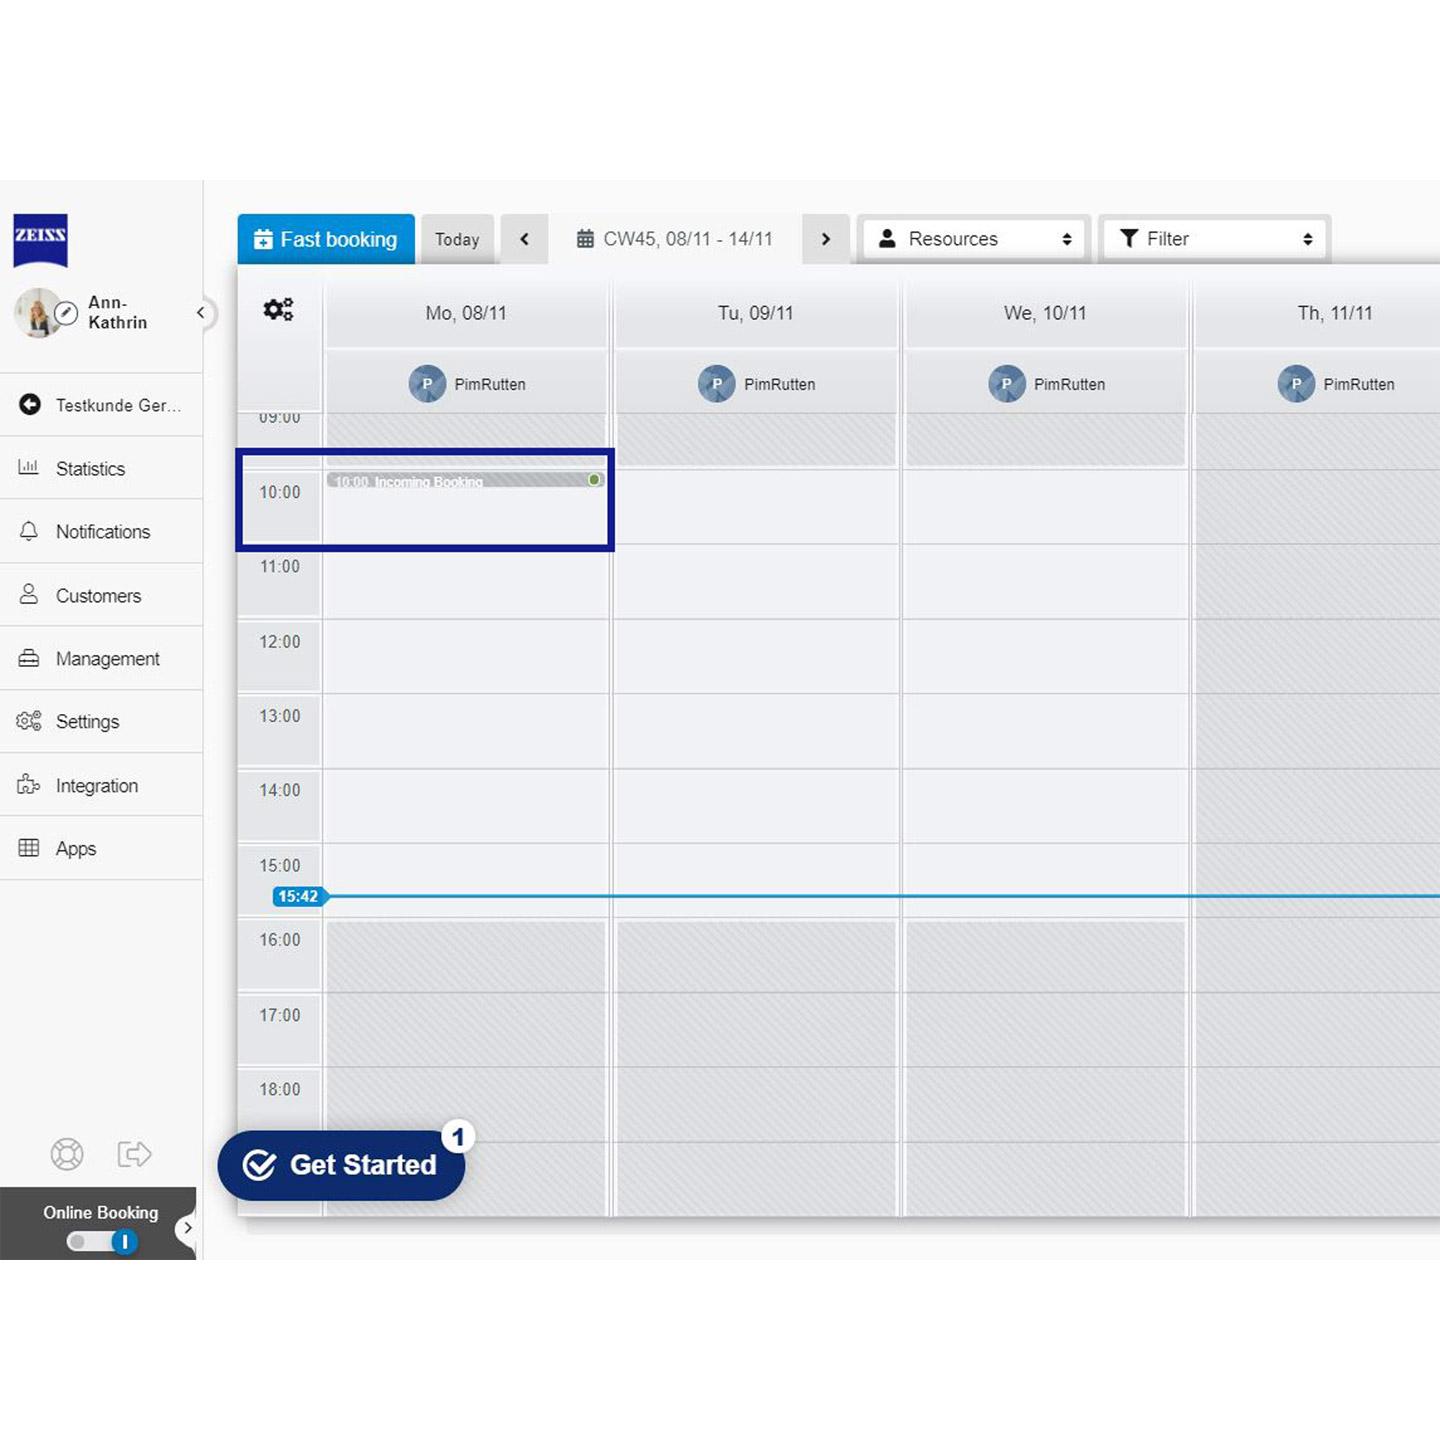
The customer selects a service and the available time slots for that service via the booking widget. - Booking slot reservation
As soon as a specific time slot is selected, it is marked as "Incoming booking" in the corresponding online calendar and is blocked for all bookers. The selected appointment is therefore no longer displayed in the booking widget for further appointment bookers.
Your employees can always see when an appointment is being actively booked and, by displaying a countdown, how long the corresponding appointment is reserved for (maximum 5 minutes). During this time no manual appointments for this slot can be entered or saved in the calendar. - Appointment booking/cancellation of the booking
When the customer finally completes the booking, the appointment is marked in colour within the calendar as an appointment. If the customer does not proceed to schedule the appointment, the previously reserved slot is released again.
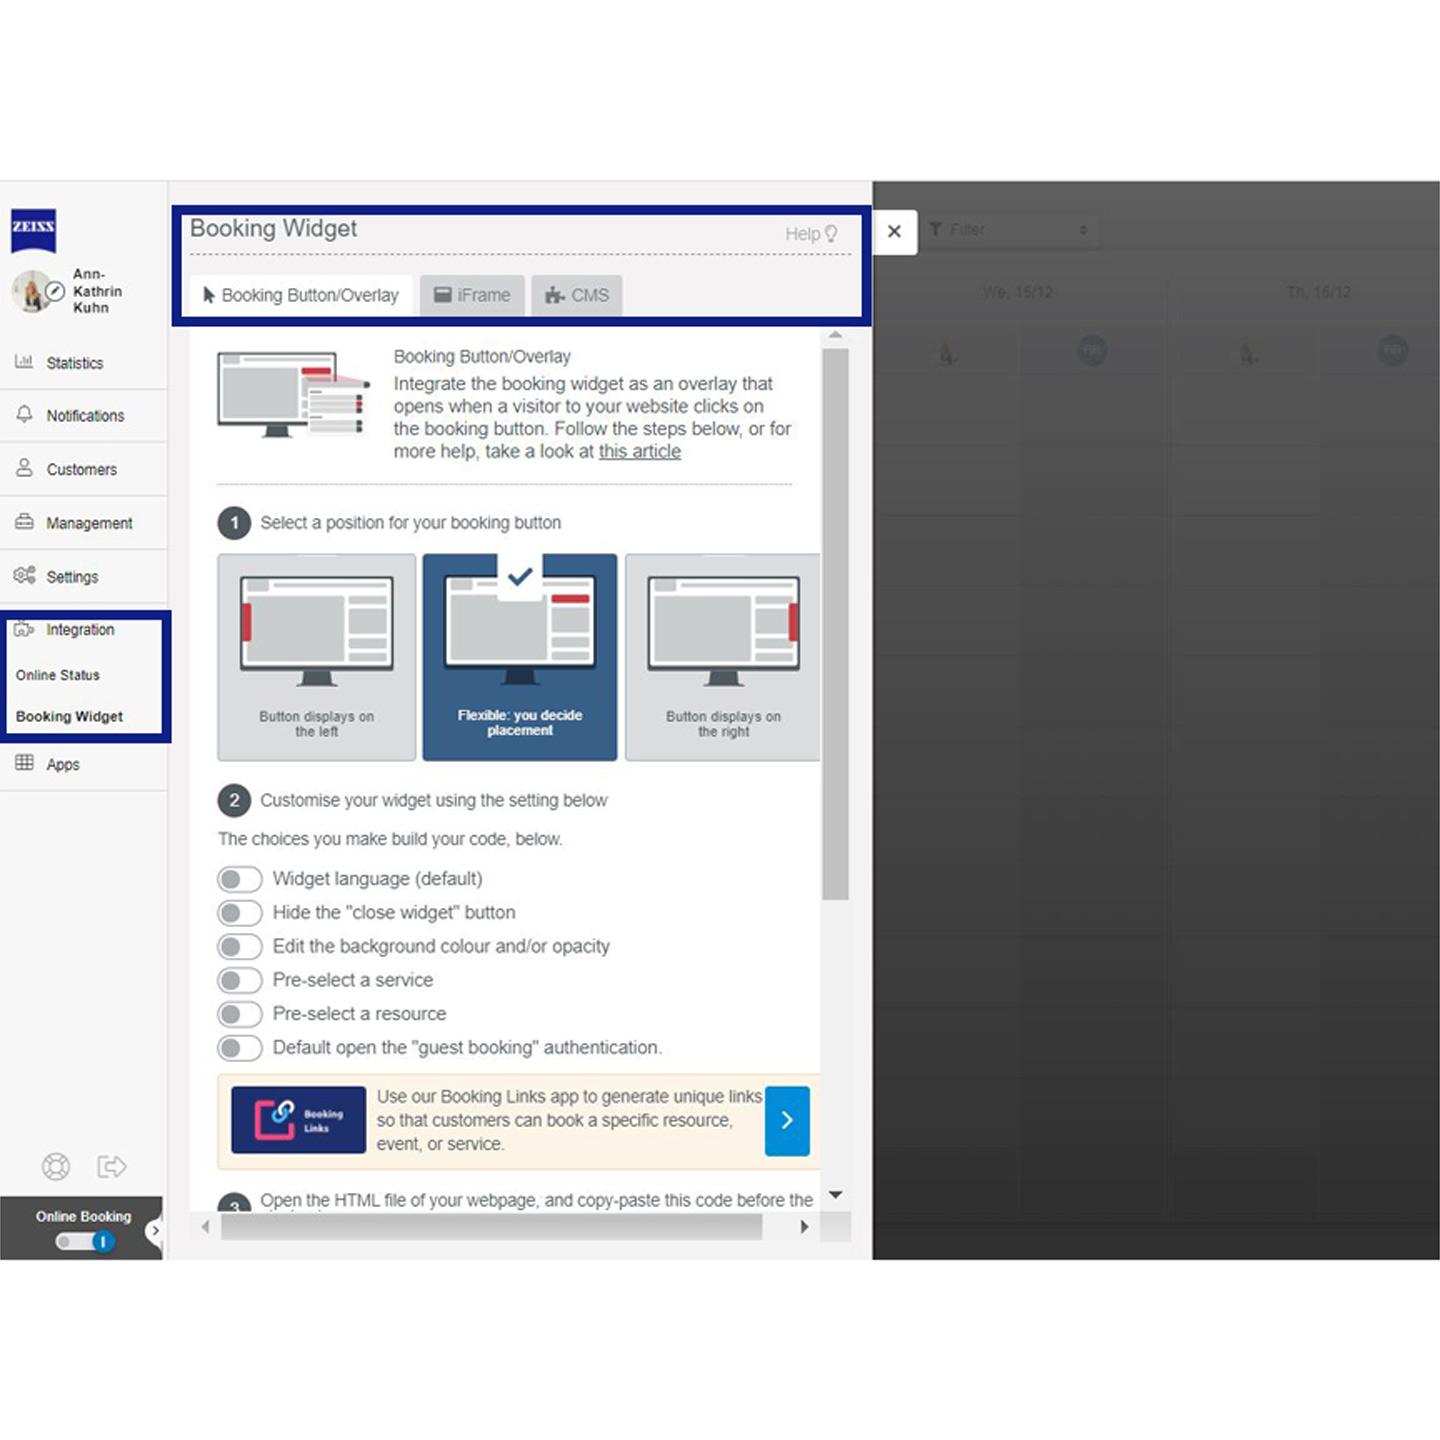

How to embed the booking widget in your website or CMS
- The ZEISS A.R.M. Platform booking widget works in the following web browsers: Edge, Firefox, Safari, and Chrome. We also have plugins for many Content Management Systems (CMS), including Joomla, Word Press, and Drupal.
- When it comes to embedding a widget to your website, you have two options: to add the widget as an overlay – triggered by a booking button – or as an iFrame. The difference lies in how it is displayed on your website. The simplest option to go for, is the booking button/overlay option, as there is less coding involved.
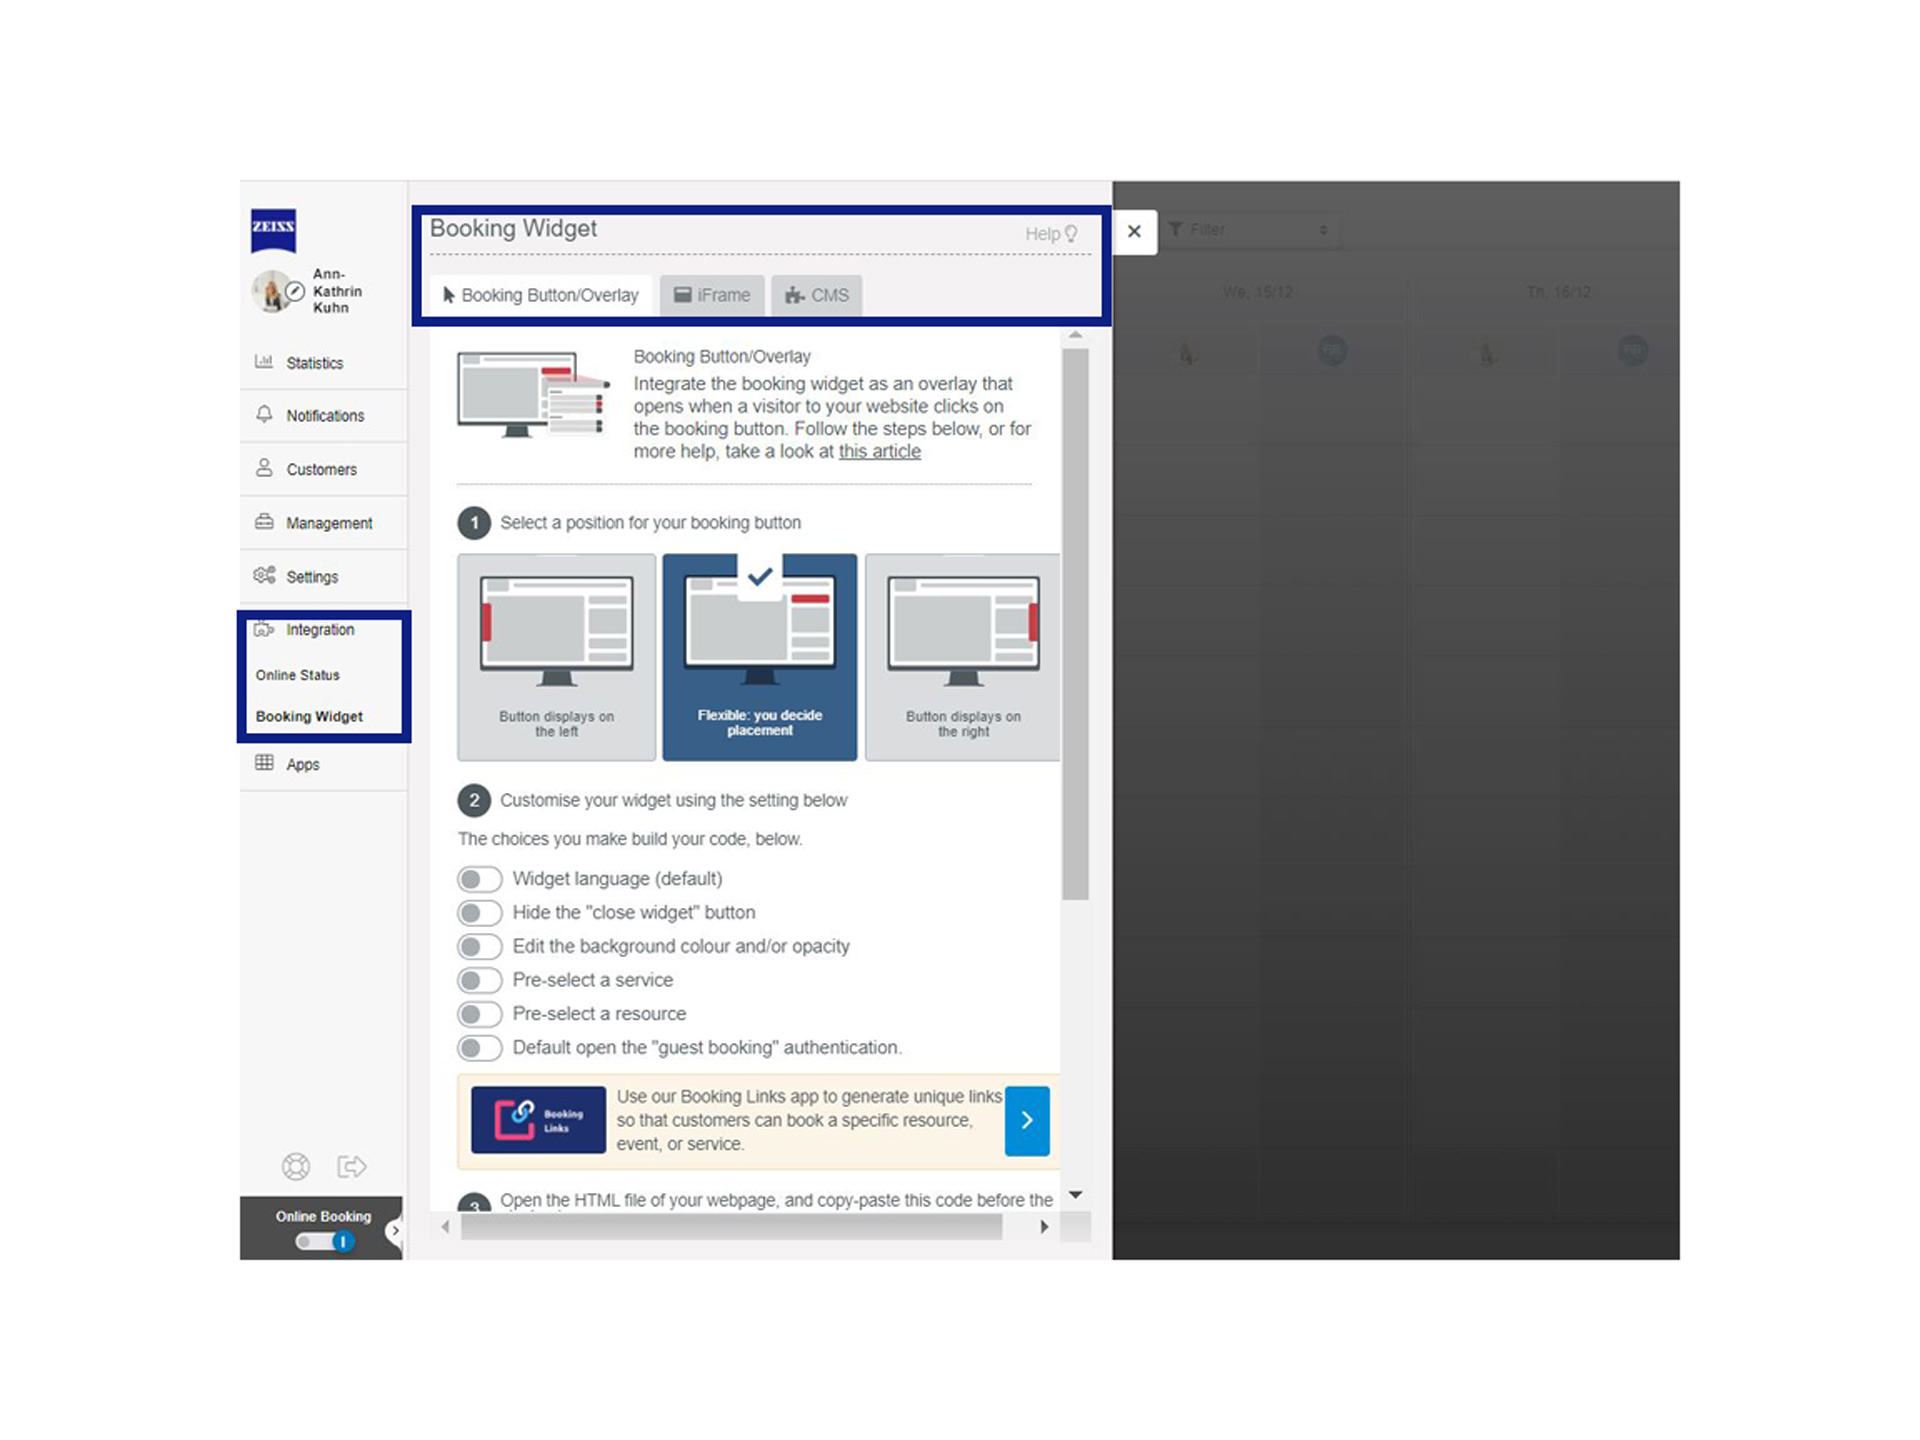

What's the difference between using a booking button and overlay vs. an iFrame for my booking widget?
Booking button ("+") overlay:
- As the name suggests, a widget overlay will sit over the center of your website, covering your content. It only appears when the user clicks on your booking button.
The booking widget as an iFrame
- An iFrame (abbreviation for "inline frame") is simply a frame within a frame. If you go for this option, your booking widget will get displayed when a visitor opens your website (there is no need for you to have a booking button). An iFrame offers you more customisation options, and for that reason, takes a little longer to set up. You also need to understand a bit about HTML in order to know where to place the widget on your website. The user can hardly miss your booking widget if you add it as an iFrame.
- As part of the integration process, you may need to provide your ZEISS A.R.M. Platform account ID. You can find this under User preferences.
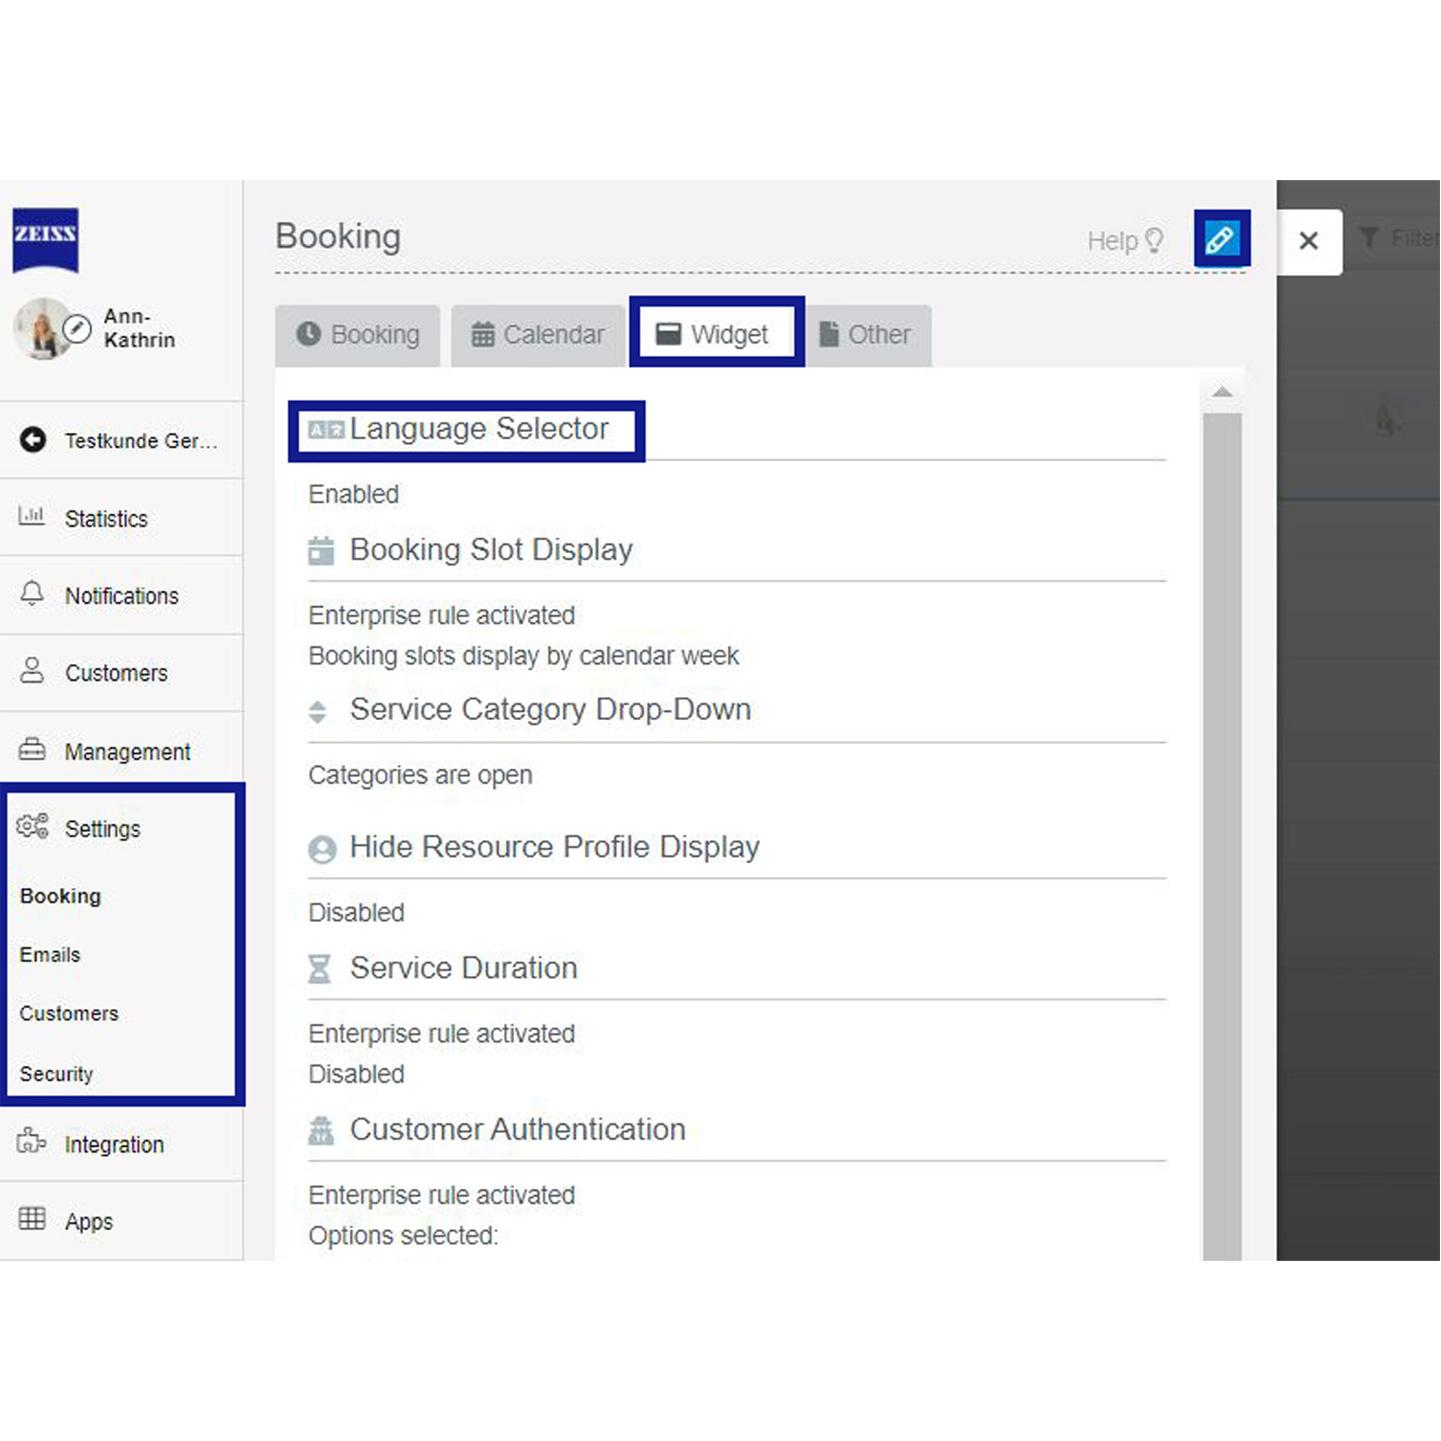

How your customers can choose their language in the booking widget
- You can give your customers the opportunity to change the language of the widget during the online booking process. Go to "Settings" >> "Booking" >> "Widget". Click on the Edit button and activate the section "Language selector".
- This way you also offer customers who do not speak your language the possibility to book appointments online in their own language.


How to track conversion on Facebook and Google Analytics from the booking widget
Conversion tracking is a feature that allows you to gather data on the booking behaviour of your customers and see your conversions.
Requirement: In order to use this feature, make sure you set-up a Facebook Business account and/or a Google Analytics account in advance, depending on which of the platforms you want to use to check your conversions.
How to set up the conversion tracking feature
- Enable the feature "Conversion tracking" in the "Settings" >> "Bookings" >> "Widget". It is disabled by default. Enable the feature and set up the functionality.
- Choose to enable conversion tracking for either Facebook, Google Analytics or both. When enabled, each of these options reveals a field where you need to place your tracking ID. This is a piece of code which you can take from Facebook and Google. Simply use the step-by-step article next to the setting to get more info.
- Important: EU GDPR requires that a consent message is displayed to customers for the purpose of data collection, therefore a consent message must be displayed. Enable the setting "Edit visitor consent" and customise the message to your needs.
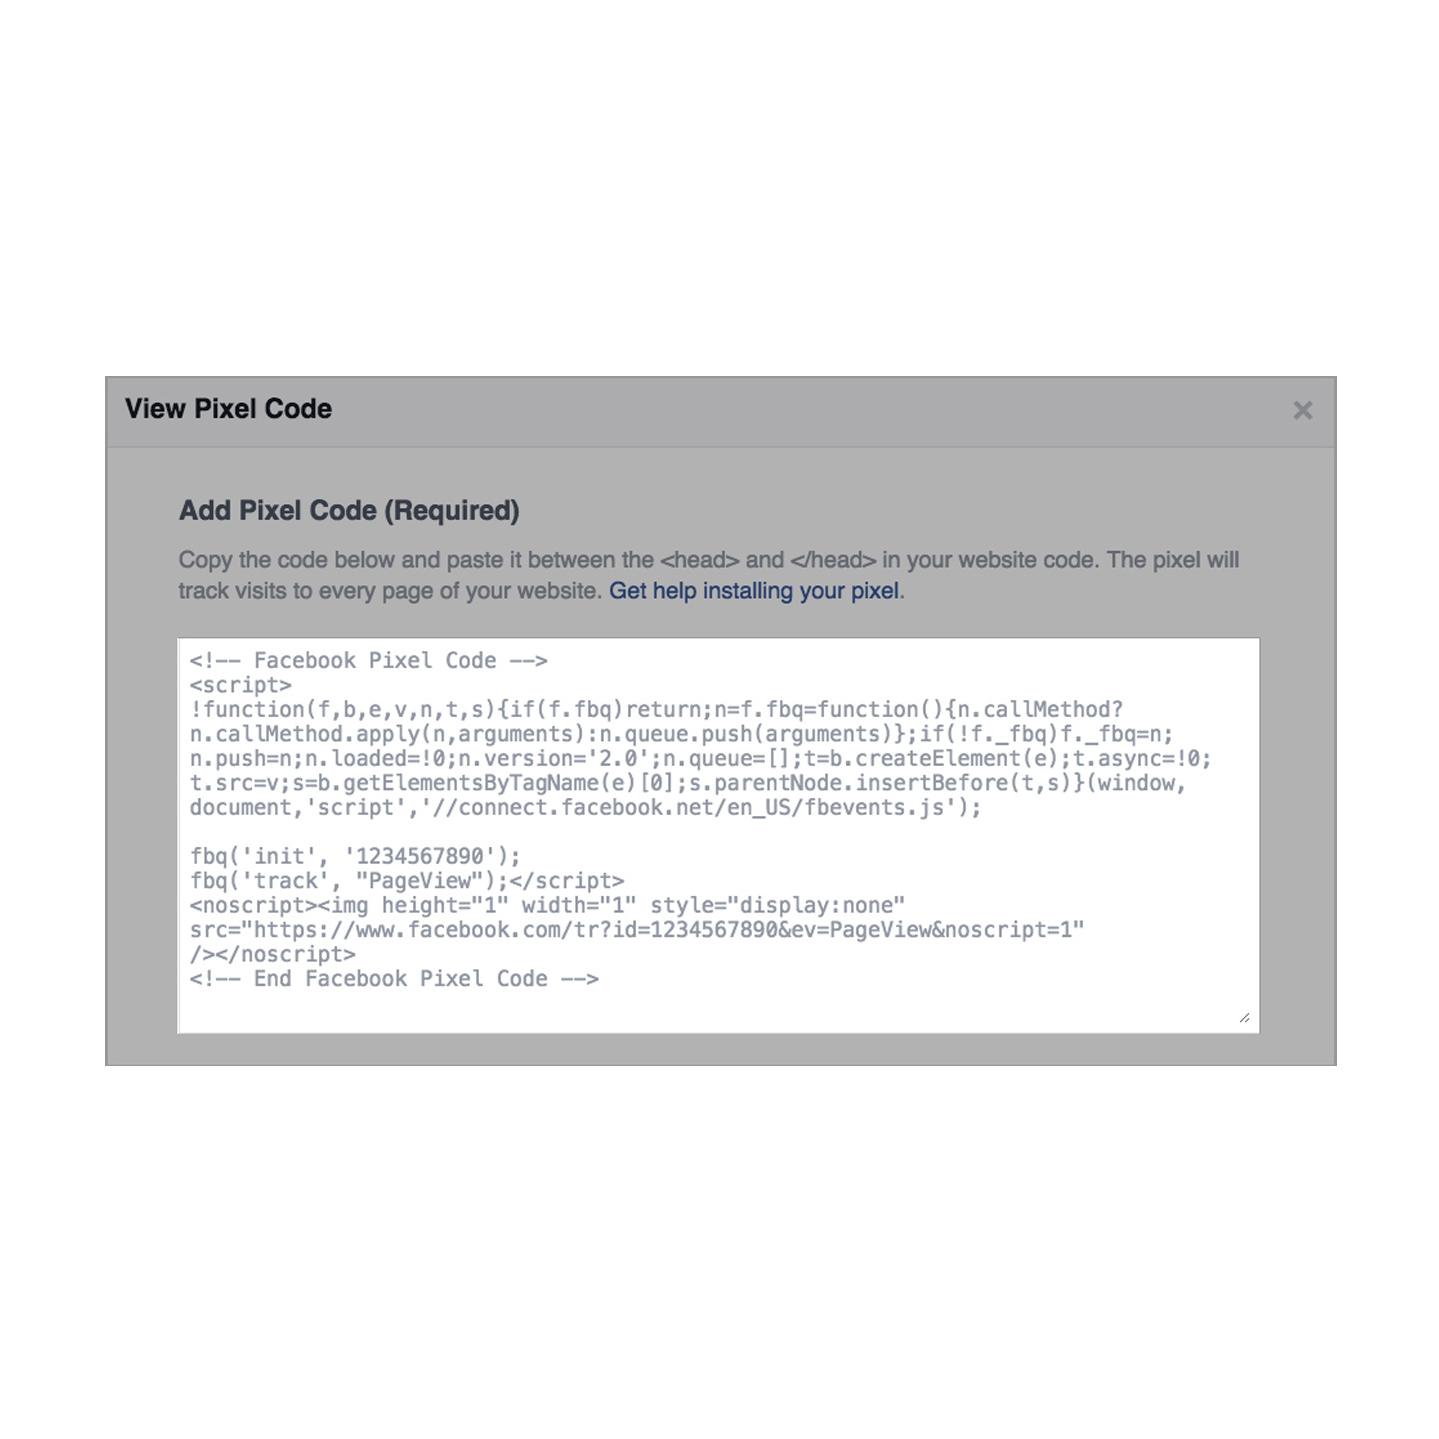

Use Facebook pixel tracking with Google Tag Manager
The Meta (Facebook) Pixel is a piece of code that you put on your website that allows you to measure the effectiveness of your advertising by understanding the actions people take on your website.
Requirement: In order to use this feature, make sure you have a Google Tag Manager Account available.
How to install the pixel via the Google Tag Manager:
Follow the step-by step explanation from TIMIFY in order to use the Facebook pixel with the booking widget.
https://support.timify.com/en/articles/3692438-use-facebook-pixel-tracking-with-google-tag-manager

Customisation of the ICS file (Internet Calendar Scheduling)
The ICS (Internet Calendar Scheduling) file is available in the booking widget, it gives the customers the option to add the booking after they book an appointment, to their personal calendars. Within the platform it is possible to customise this file.
If you decide not to use the ICS file customisation feature, the default ICS file will be sent with the confirmation email.
How to activate the ICS file
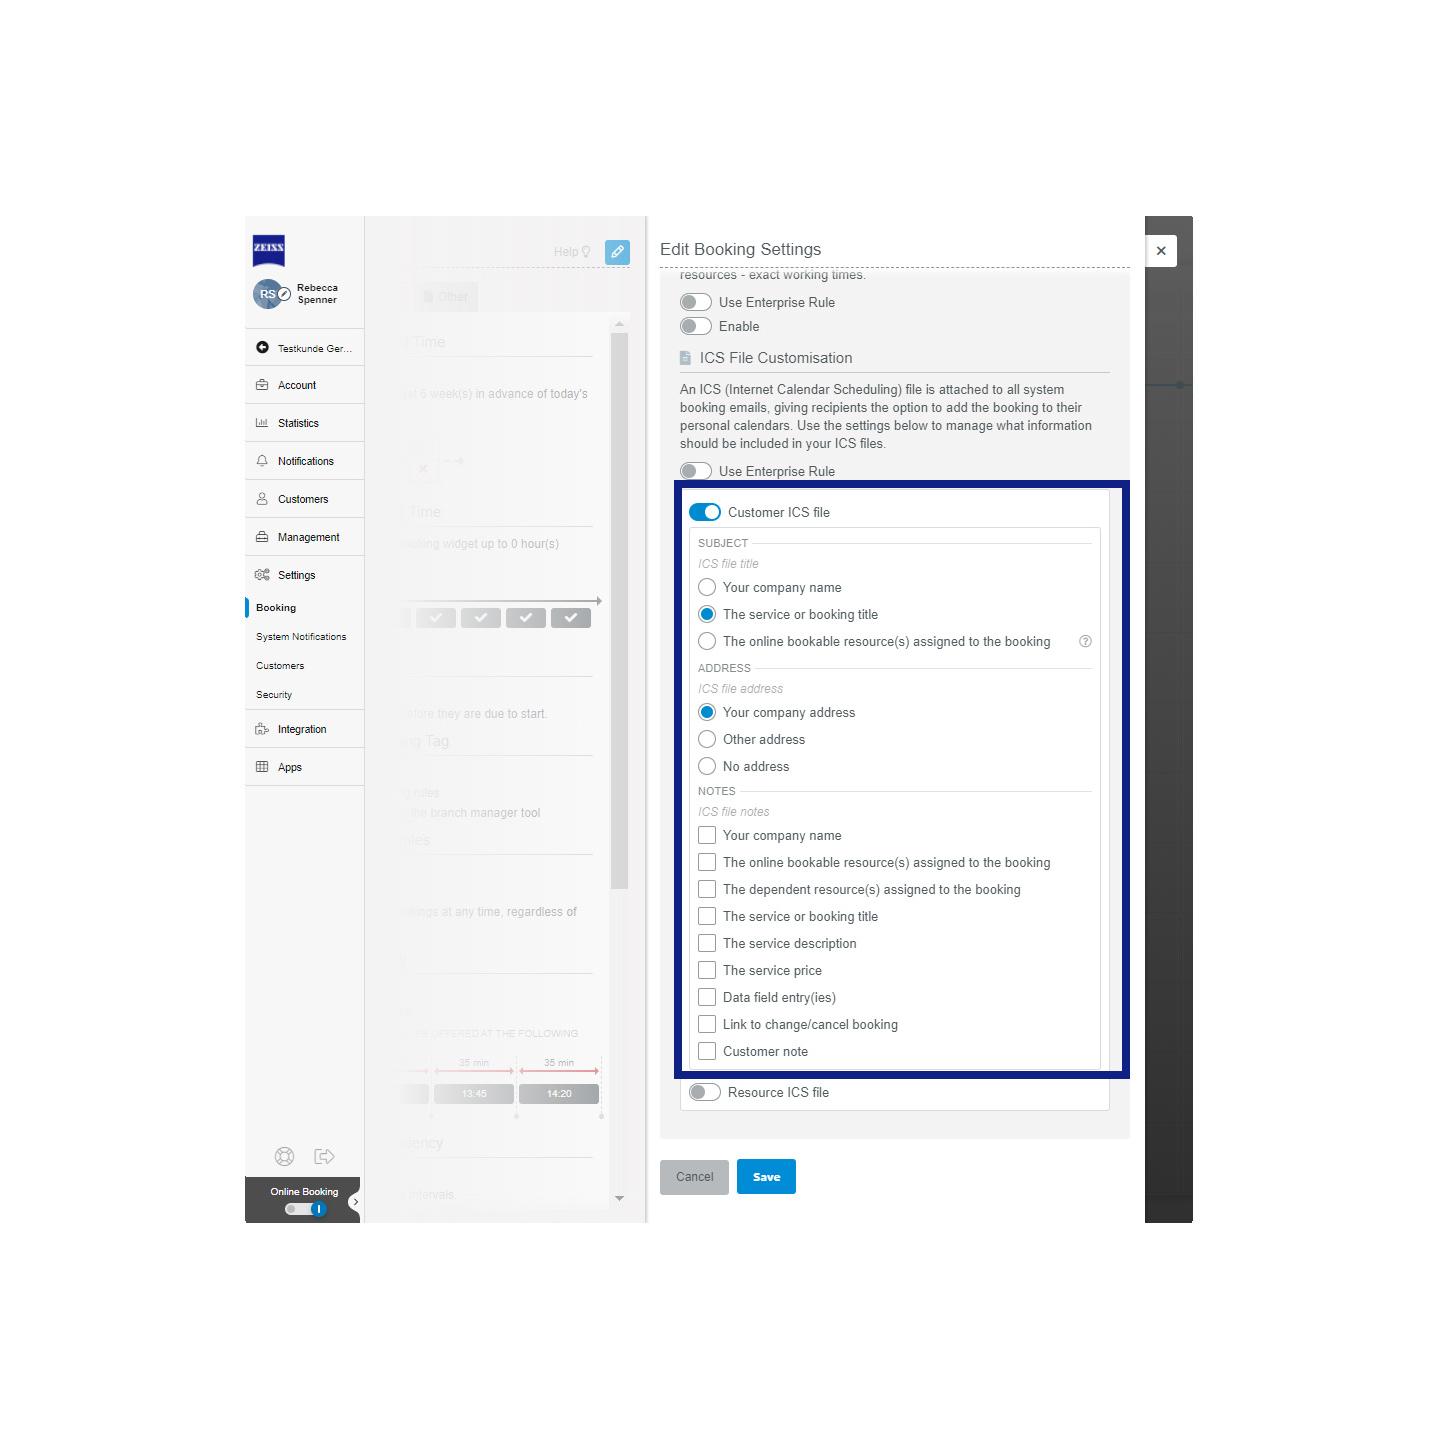
In order to activate the ICS file customisation feature, go to - "Settings" >> "Bookings" >> "Edit booking settings", scroll down to the bottom where you will see both options Customer ICS file and Resource ICS file. Disable the ICS file that you need.
Customer ICS file: Set up what information you want to be shown in the customer´s calendar. A useful option here is the "Data field entry(ies)" and "Customer note“
Resource ICS file: Customise the settings for your resources, so they can have the booking details and customer information directly in their preferred calendar. A useful option here is the "Link to calendar booking"