
Resource Management
Efficient planning of employees, rooms, instruments and more.Improve store efficiency by organized resource management. Manage efficiently your staff, rooms and instruments to offer an engaging customer experience.
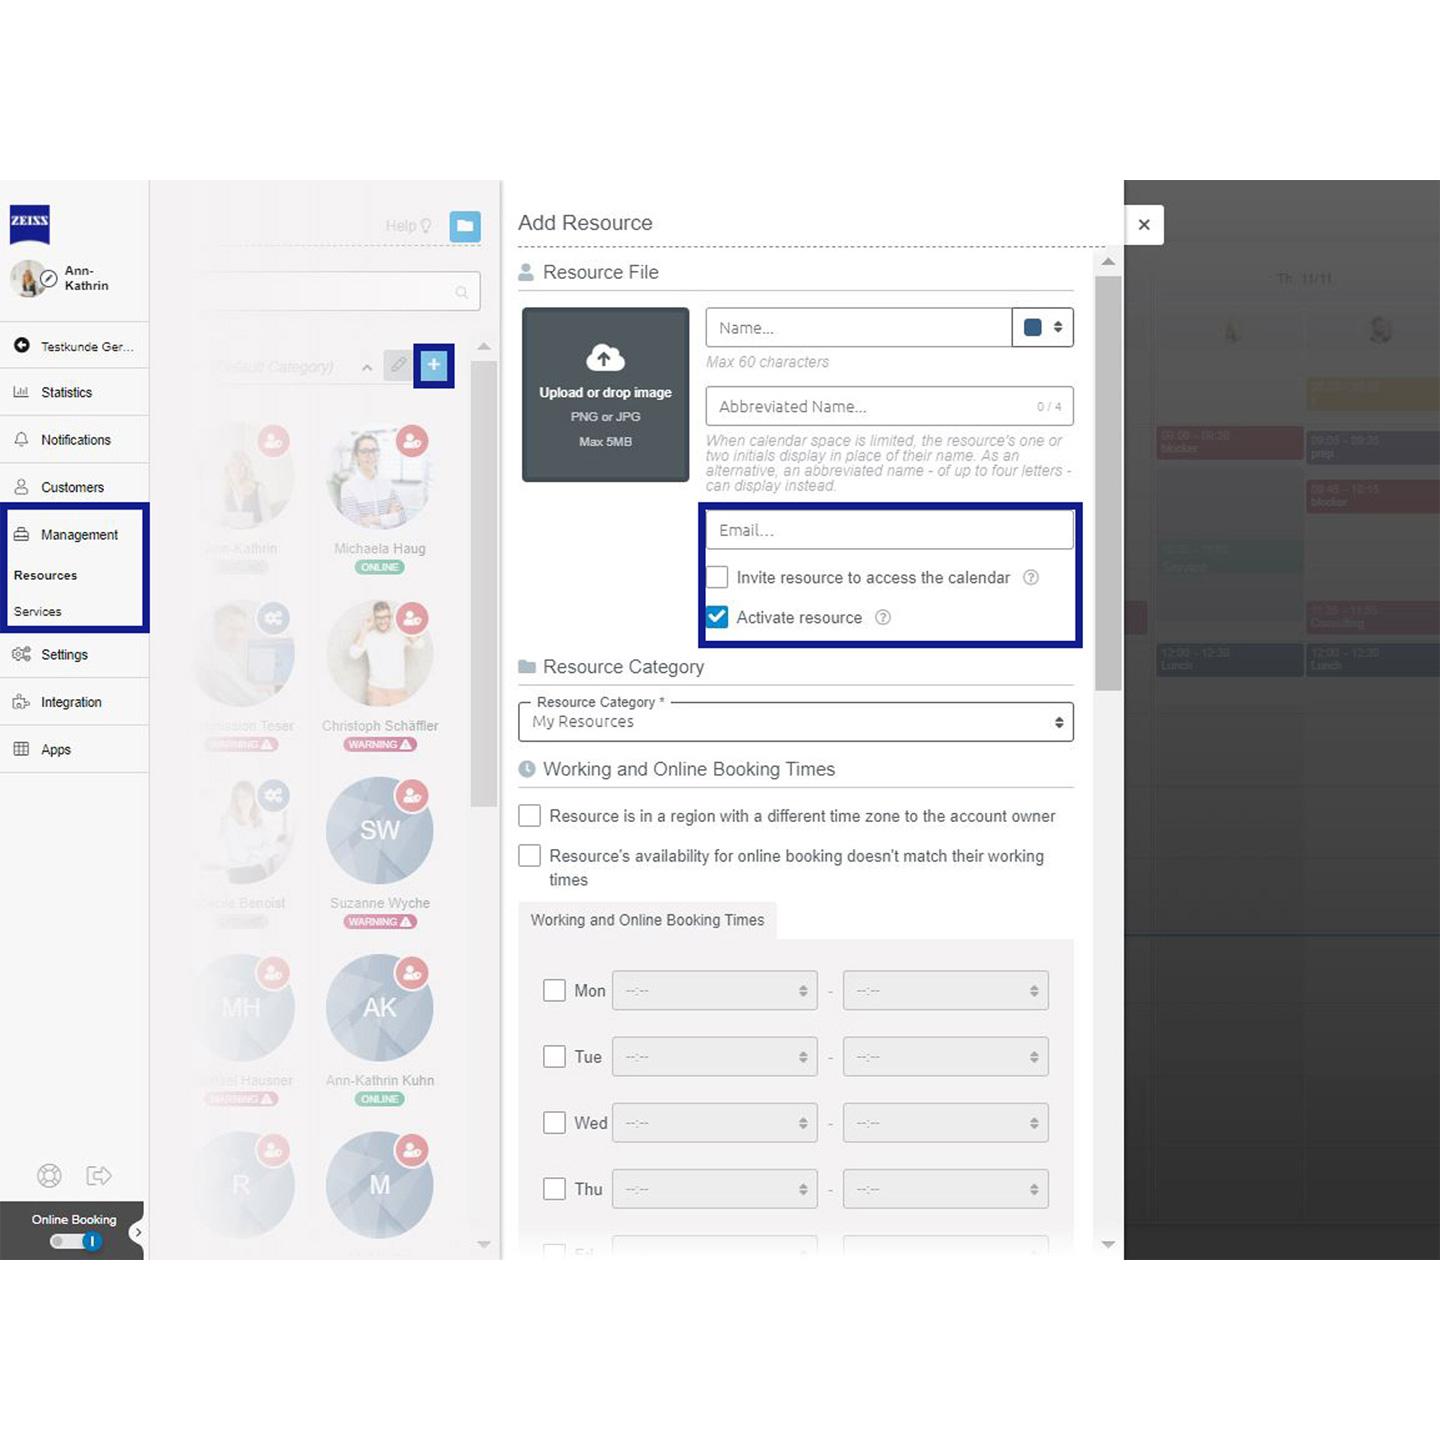

How to invite your employees to your account to share your calendar
- Go to "Management" >> "Resources" and add another resource to your account by clicking on the ("+") button.
- Enter the first and last name of the employee.
- If the resource should access the software with own user credentials, please activate the checkbox "invite user for this resource"; otherwise, do not select the checkbox. In the latter case the resource can still be booked for appointments and managed work hours can still be managed.
- To create a user account, enter the email address of the employee. You can then set the working hours. When saving the resource, an email is sent to the added employee.
- The employee must create a ZEISS ID Account to access the application. After the registration, the user can login to the ZEISS A.R.M. Platform with their own ZEISS ID account.
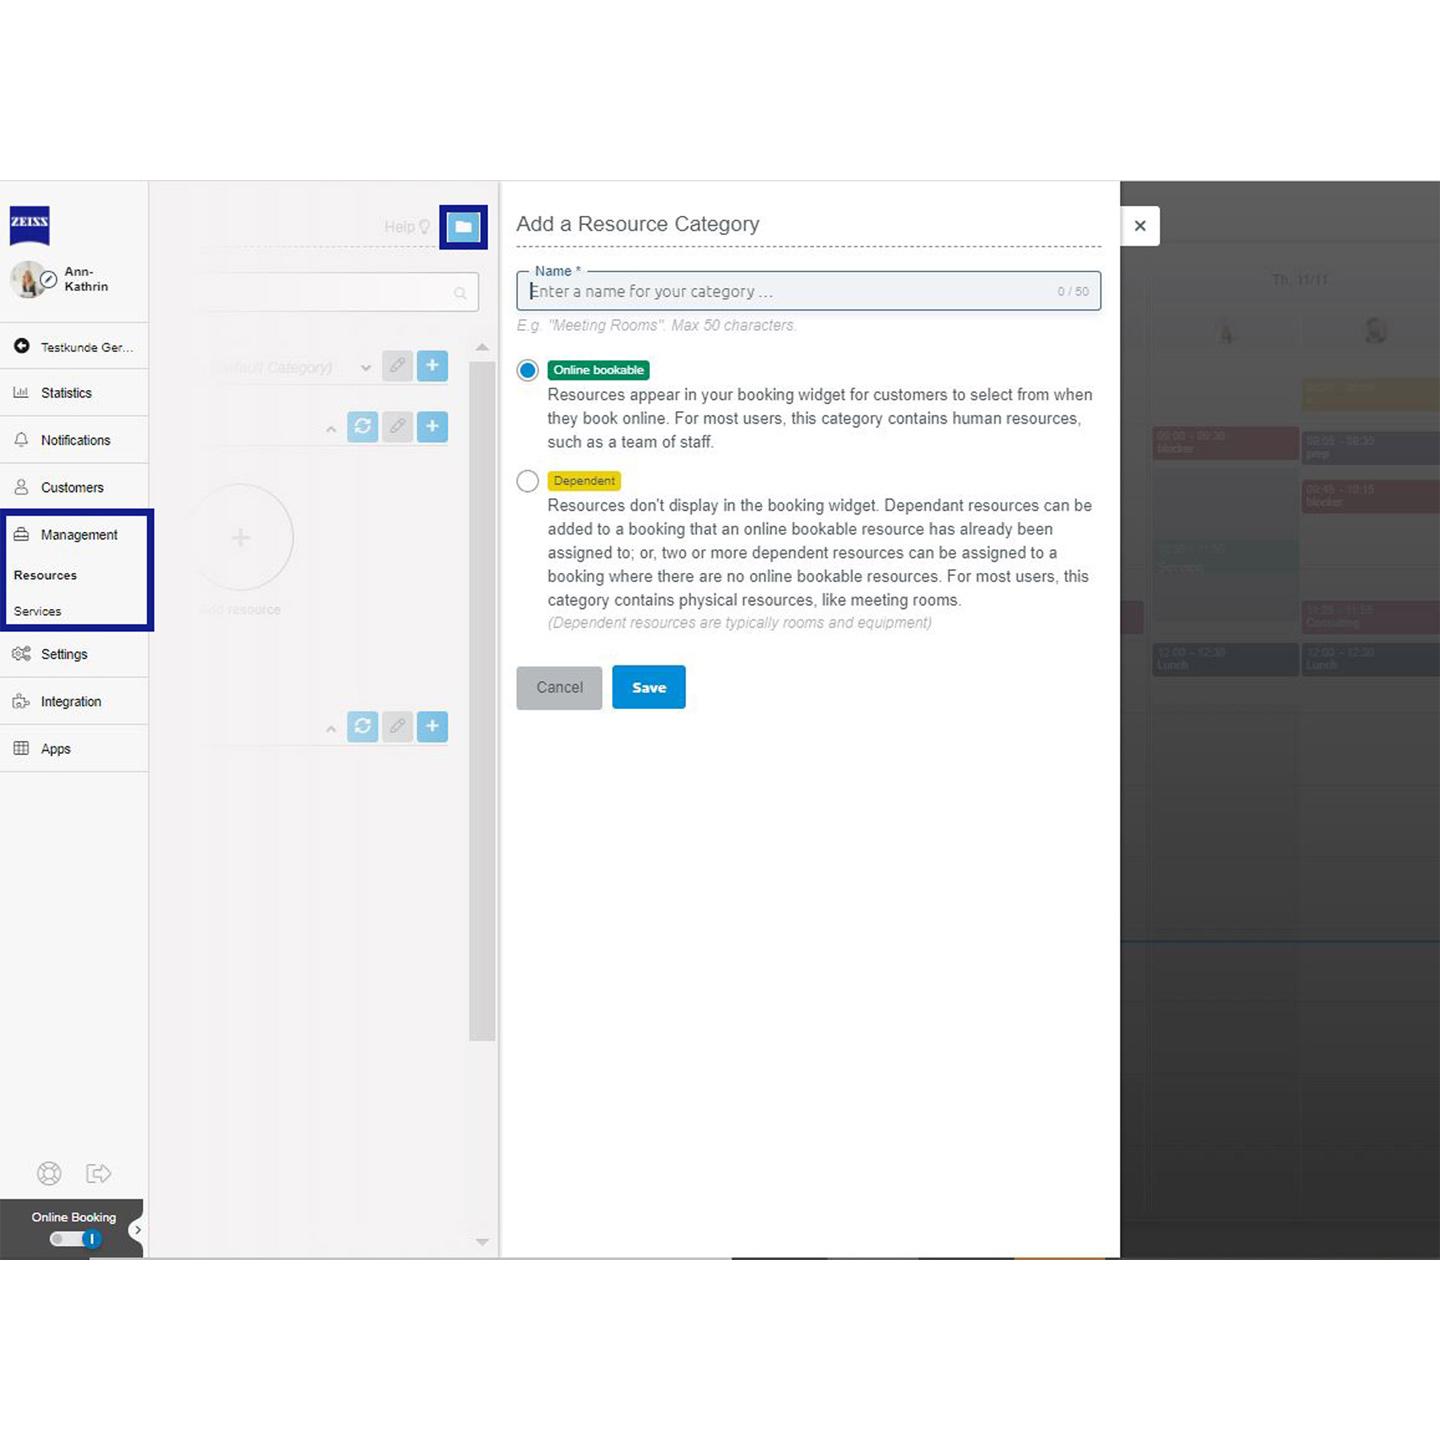

How to allocate your resources to categories
- Categories are needed to be able to create dependencies between two resources. To create a new category, click on the folder button in the top right corner.
- Next, specify whether resources in this category can be "online bookable" one by one, for example if for a specific service one or more of the resources need to be booked; or if one of the resources is "dependent" (for example, a meeting room) and must be booked in combination with other resources that are online bookable.
- The dependencies cannot be booked directly by the user, only indirectly because they relate to a logic of the service. Dependencies help to create a logic, which combines a service with the required capabilities to execute the appointment (e.g., rooms, optician devices and other).
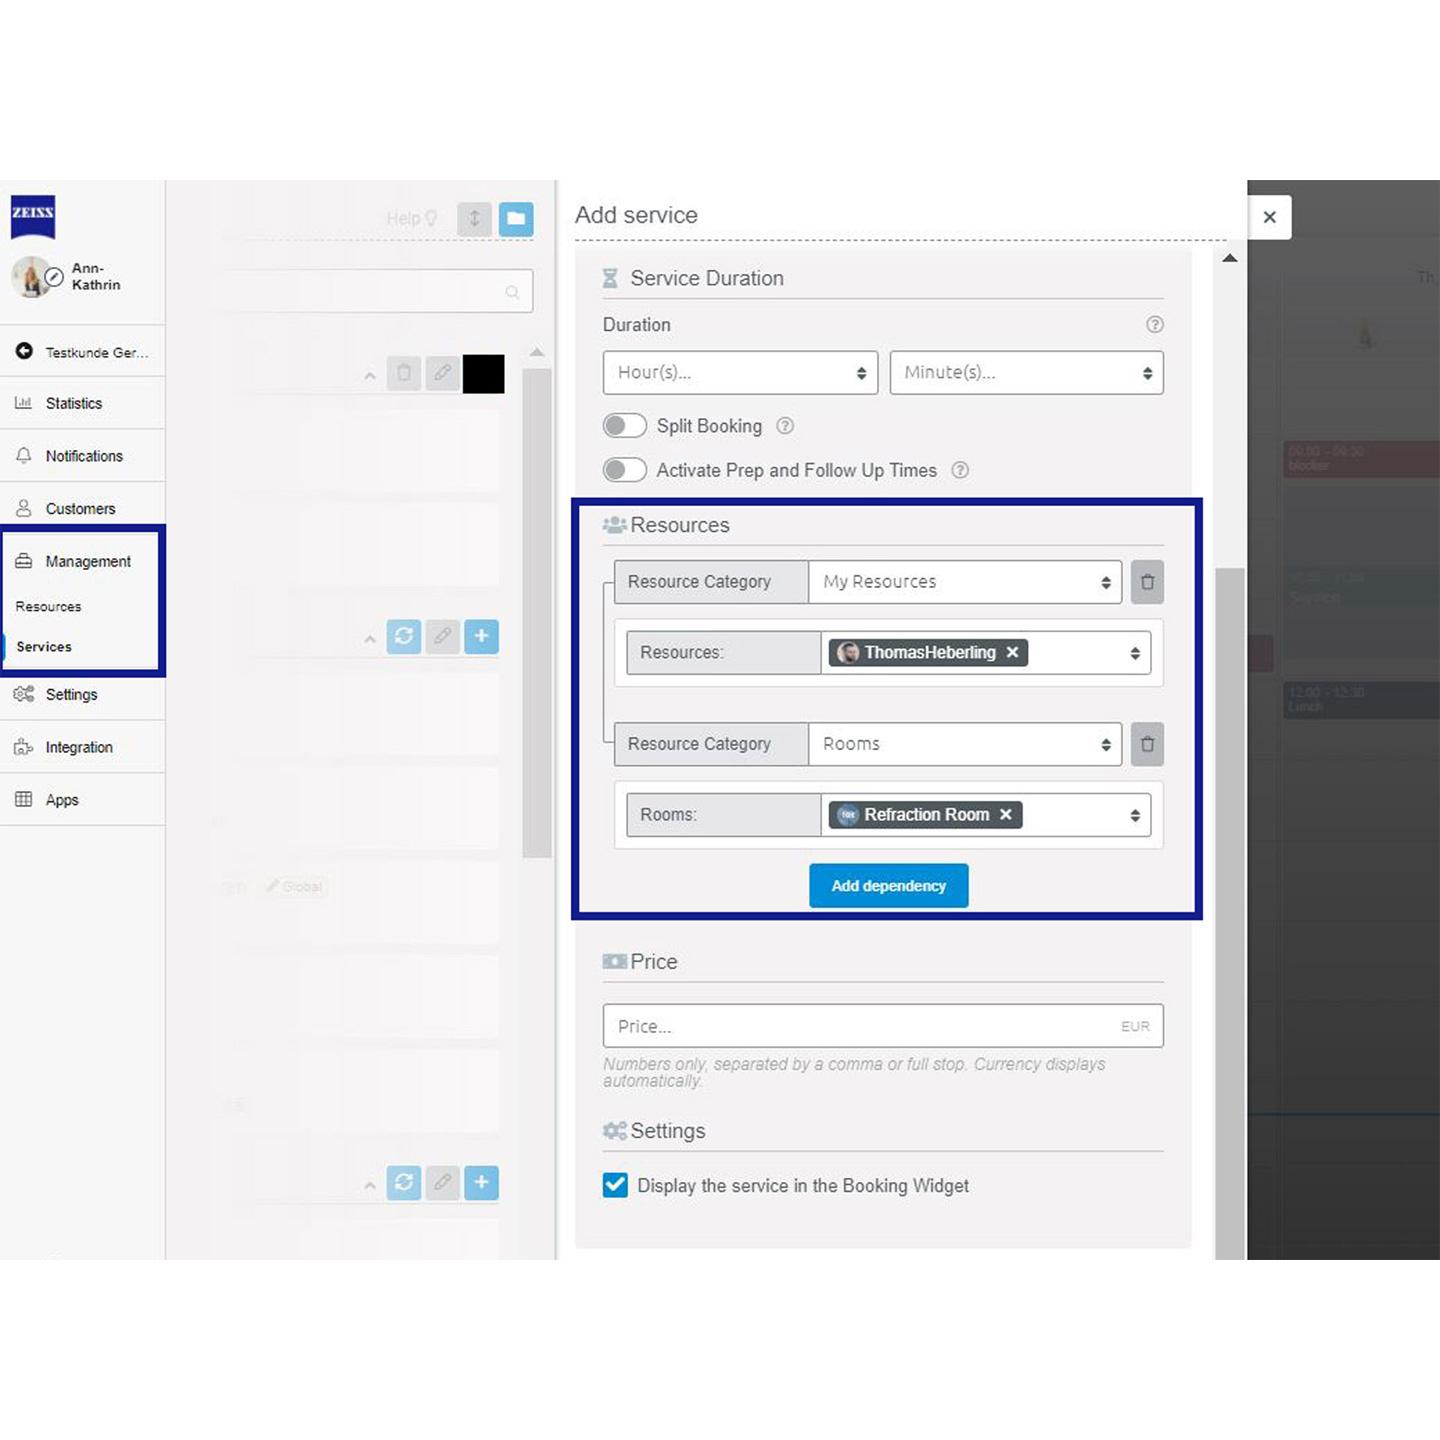

How can I create dependencies between multiple resources?
- For complex bookings, it is sometimes necessary to schedule several employees or, for example, employees with rooms dependent on each other. With the ZEISS A.R.M. Platform you can define which resources should be linked and when, simplifying the administration and utilisation of multiple resources.
- To create a dependency, you must first create a service in the "Management" >> "Services" section. Here you can create dependencies when adding resources. Now you can specify, for example, that certain resources must always be available in combination or at least with one resource from different categories such as employees and rooms.
- Start with the first resource or with the selection of several resources. With the button "Add another dependent" you can add a dependency. The example in the picture shows, for example, a scenario in which one of three selected employees must be available with a room at the same time for the booking to be bookable.
- You can delete a dependency using the trash icon.
- Linking several resources makes it easier for you to optimise the utilisation of your employees, rooms or equipment. This ensures that all necessary resources are always available for a specific service and at the required time.
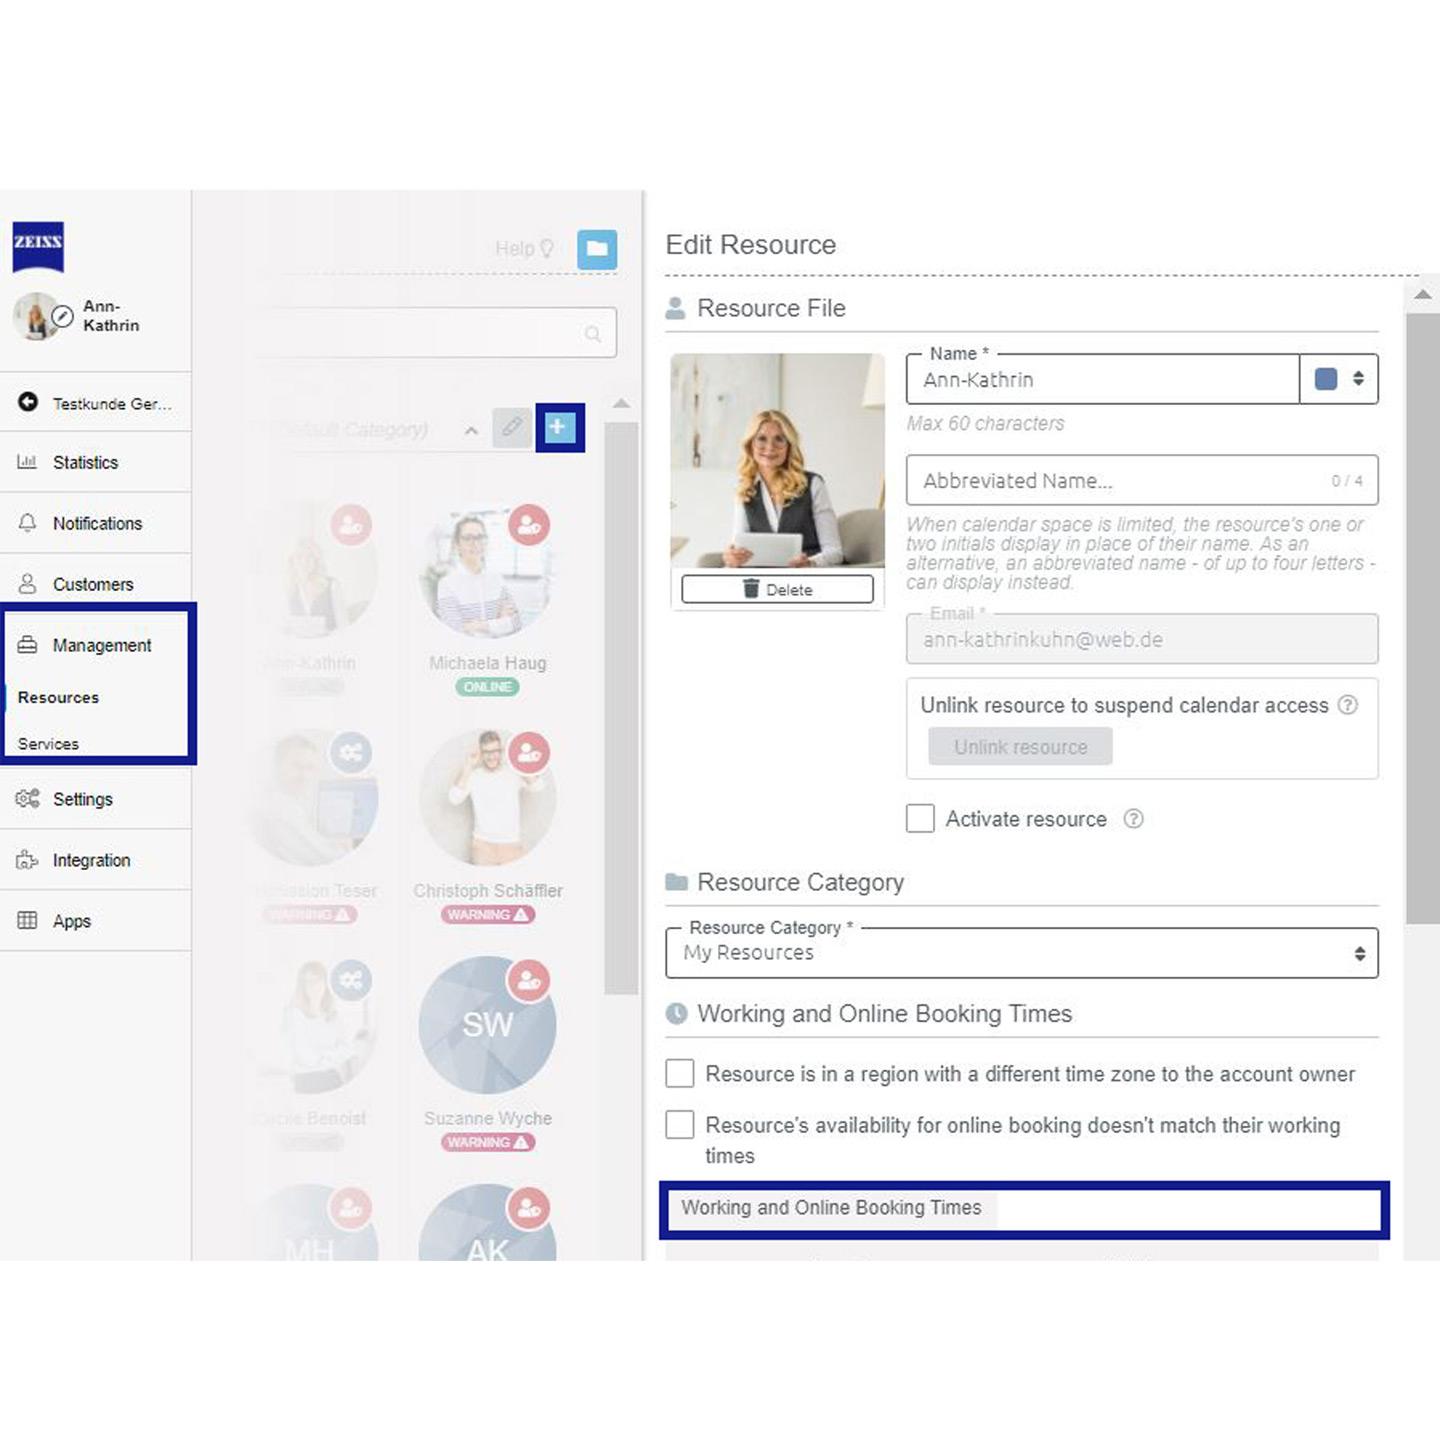

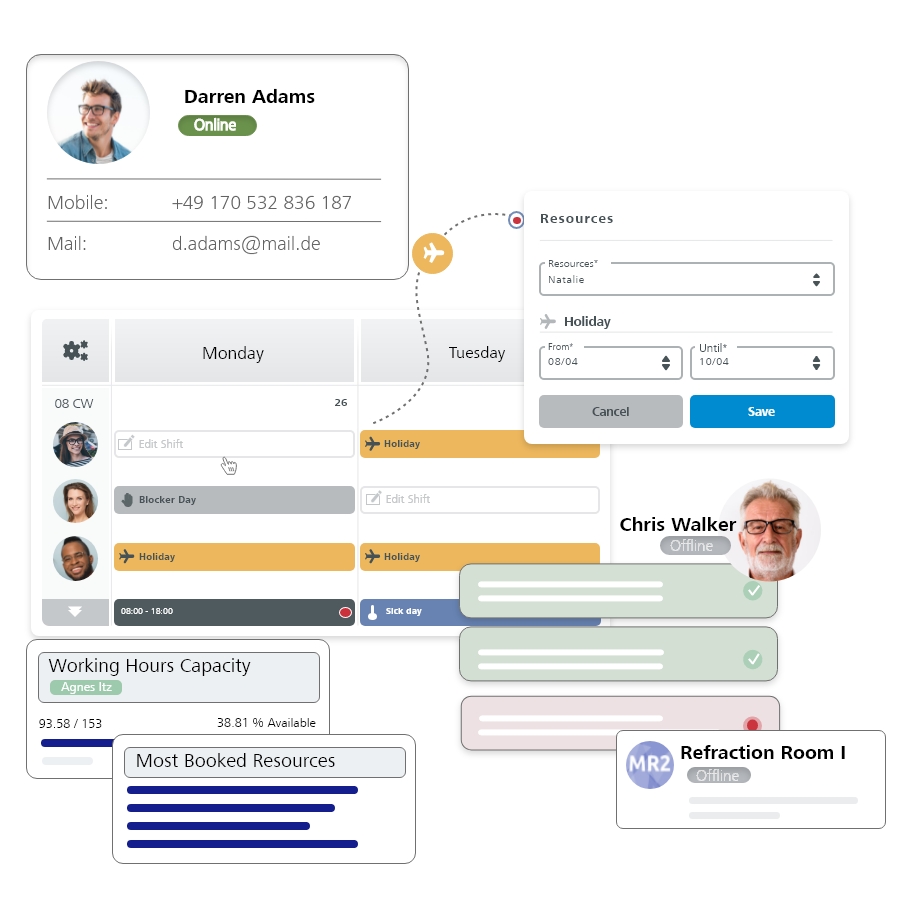
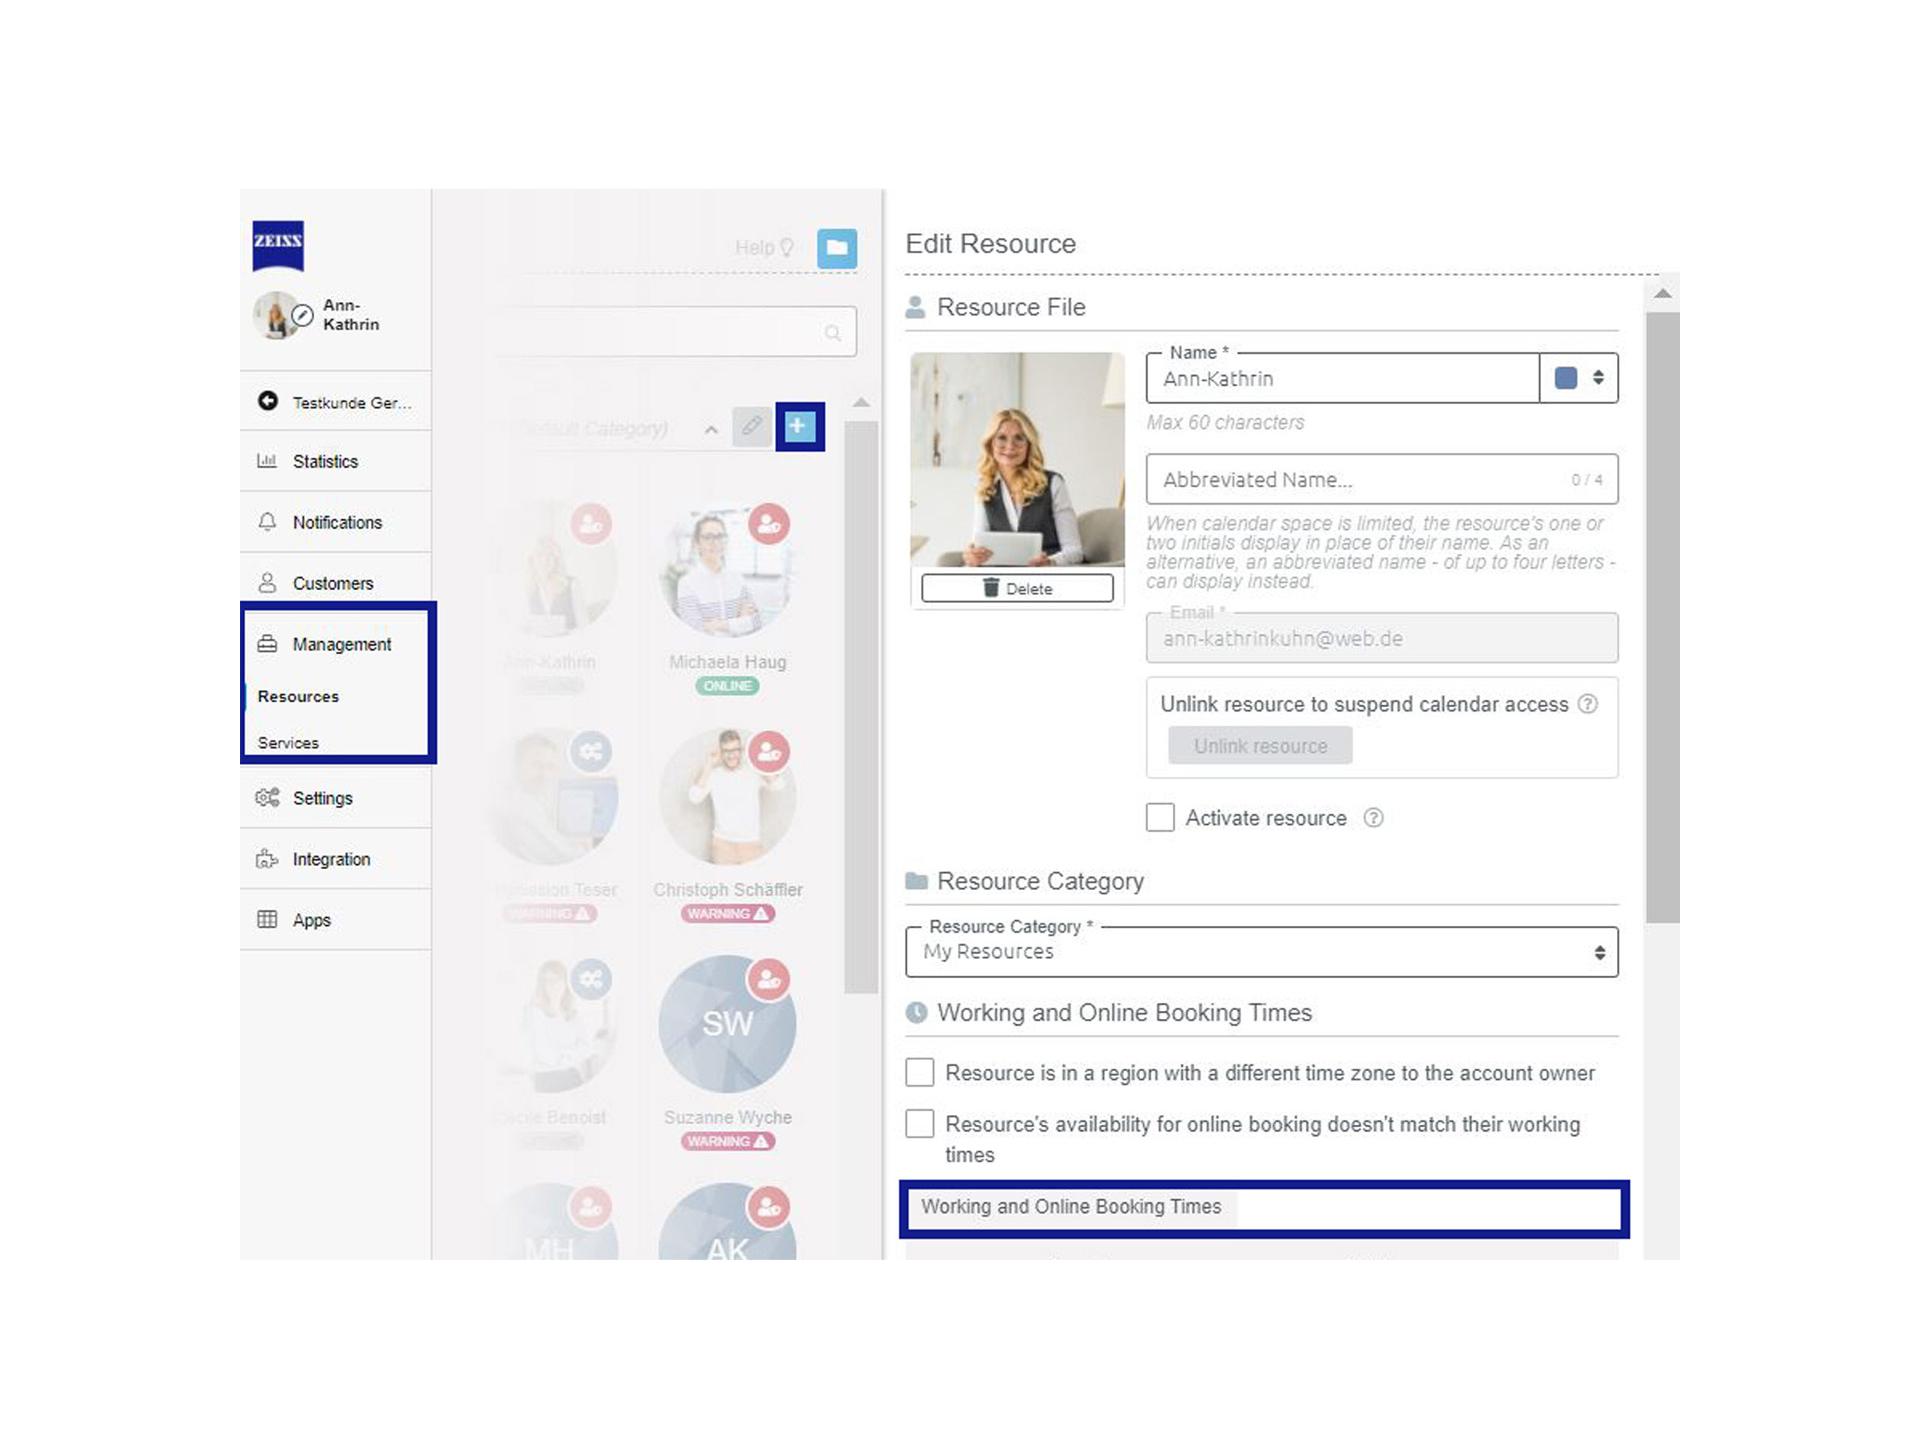
How to create working and booking times
- The defined working times provide a better overview in the calendar, because they are displayed as white areas. Therefore, you always know who is working when and who can take appointments. Grey areas are displayed as off times.
- With the Booking times you determine the period in which dates may be offered online.
- You can decide for yourself whether working and booking times should be identical or if you only want to offer dates for online booking at selected times or days. You can do this via the tab "Management" >> "Resources".

How to set recurring working and booking times
- If you would like to set recurring working times, e.g., every Monday - Friday from 9 - 18:00, then simply go to the "Administration" >> "Resources" section. Open the profile of the resource you want to set times for. Here you can enter individual times, which will be used for every week.
- You can then ad sick days and vacation days via the shift plan and block individual days or weeks.
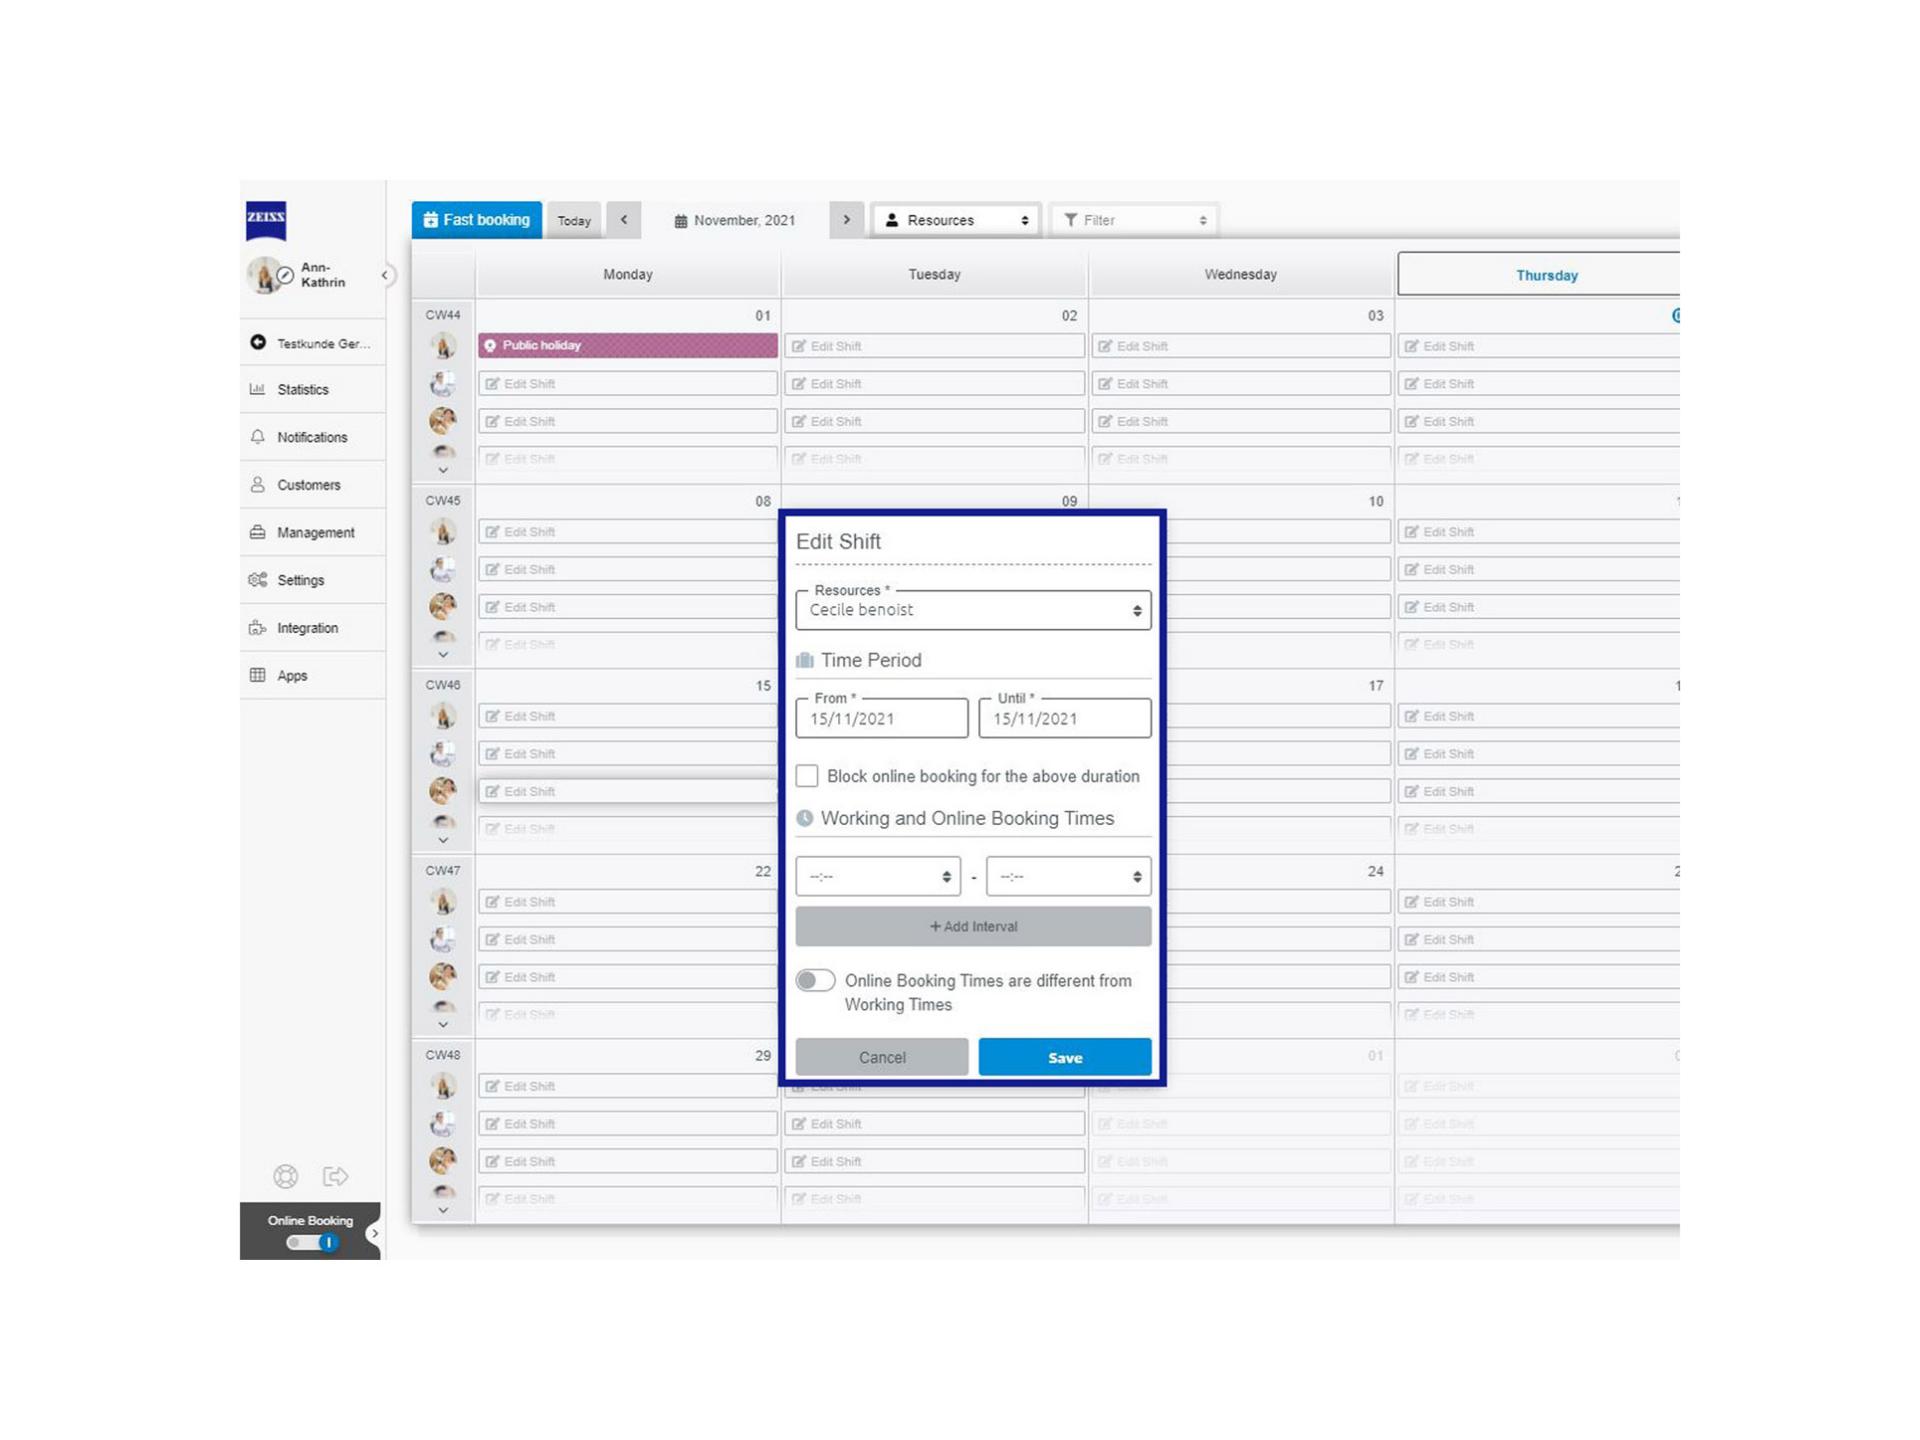

How to set flexible working and booking times
- The shift planning tool is used to manage the shifts and irregularities of work times, e.g., vacation, travel day, sick days, or to just block days.
- Flexible working and booking times can be set via the shift plan. So, if you only want to be bookable for certain days/weeks or if you work daily/weekly at different times, you can define these times in the shift plan.
- The times can be set by clicking on the pen button. Here you can define whether the set times should only take place for this one day or for a longer period.
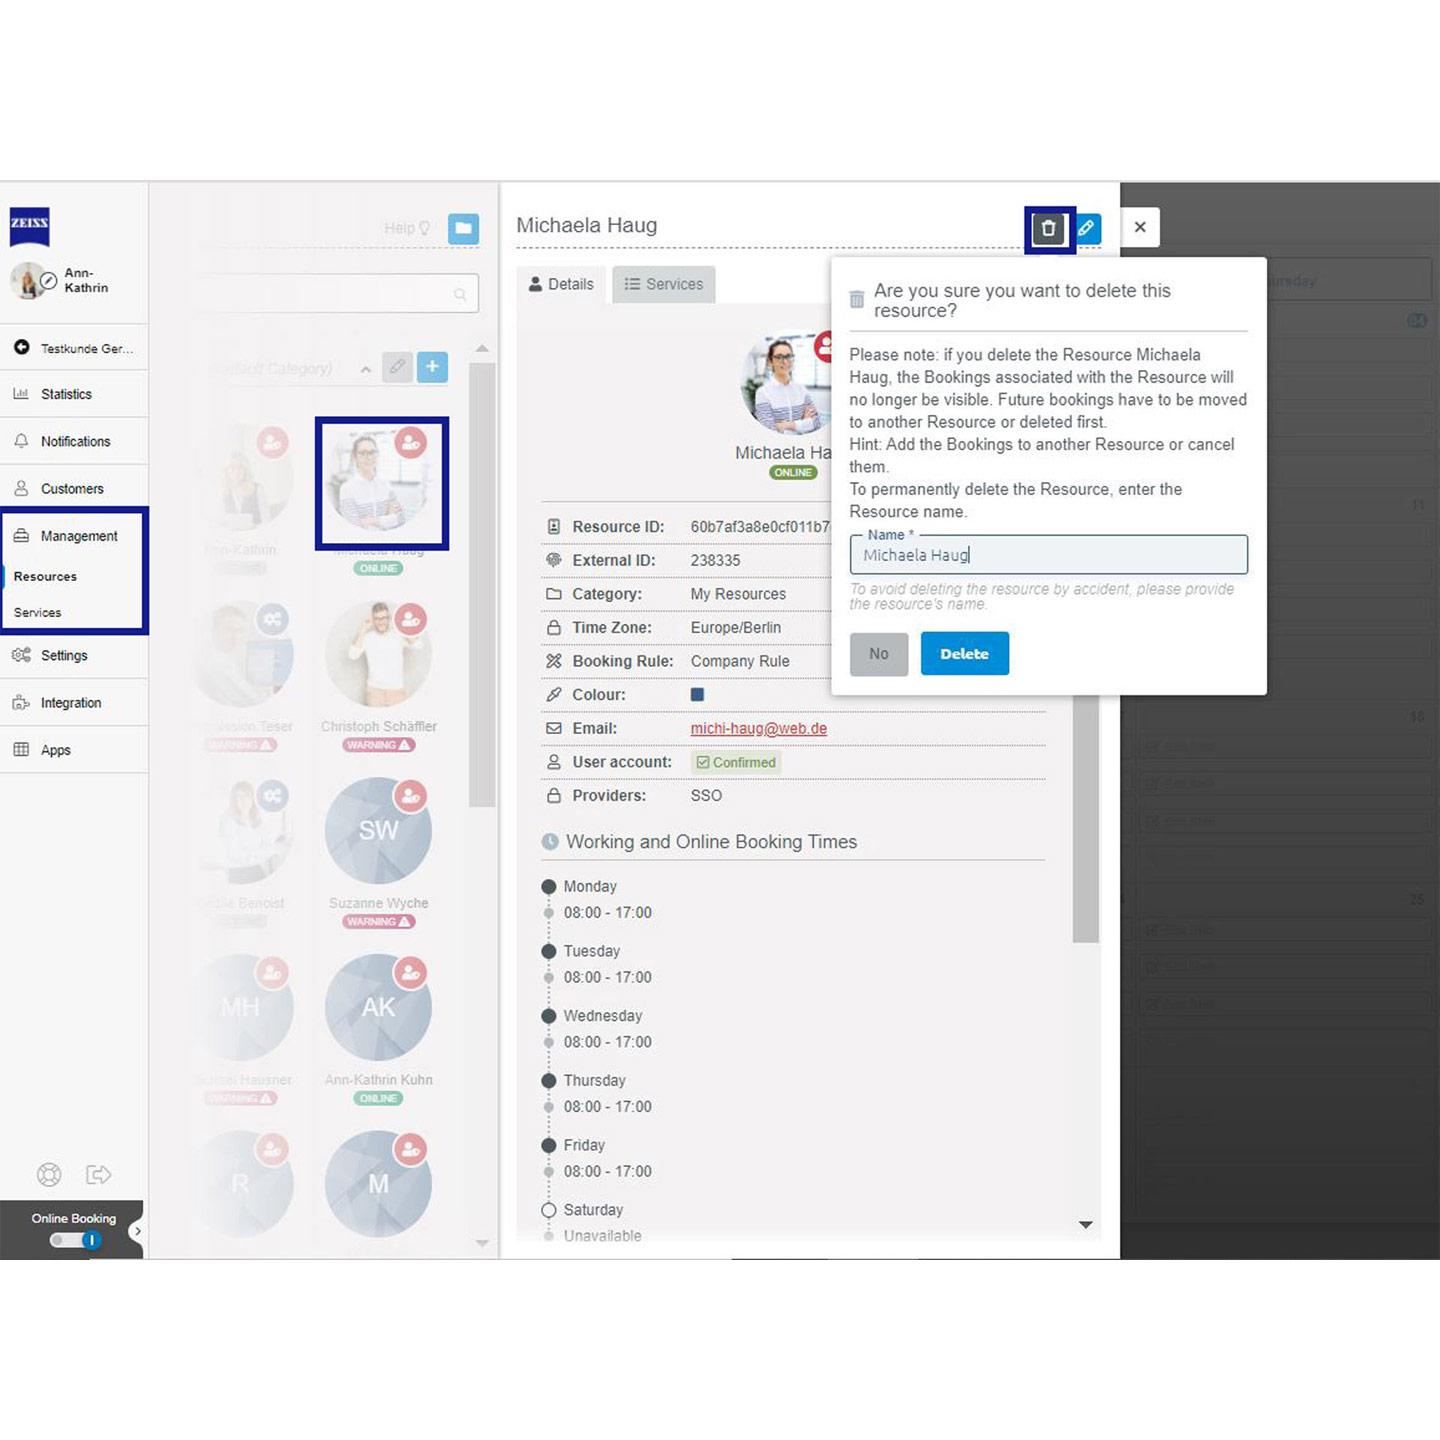

How to delete employees from the ZEISS A.R.M. Platform
- When an employee leaves your company, it is necessary to delete the resource from your ZEISS A.R.M. Platform account.
- First select the resource you want to delete by clicking on the section "Management" >> "Resources". Select the resource to open a window with the specific information about this resource. In the top right corner select the option "Delete resource" by clicking the trash button.
- Please note: As soon as you delete the resource, their appointments will be deleted as well. Please make sure that, before you remove the resource, you assign their appointments to another employee or cancel them first.
- To make sure that the resource is not deleted by mistake, enter their name in the text box and confirm you want to delete the resource with "Yes, delete now".
- The resource won't be able to log into the shared calendar anymore and will not be displayed for customers during online booking after you have deleted it.

How to manage your employees’s access rights
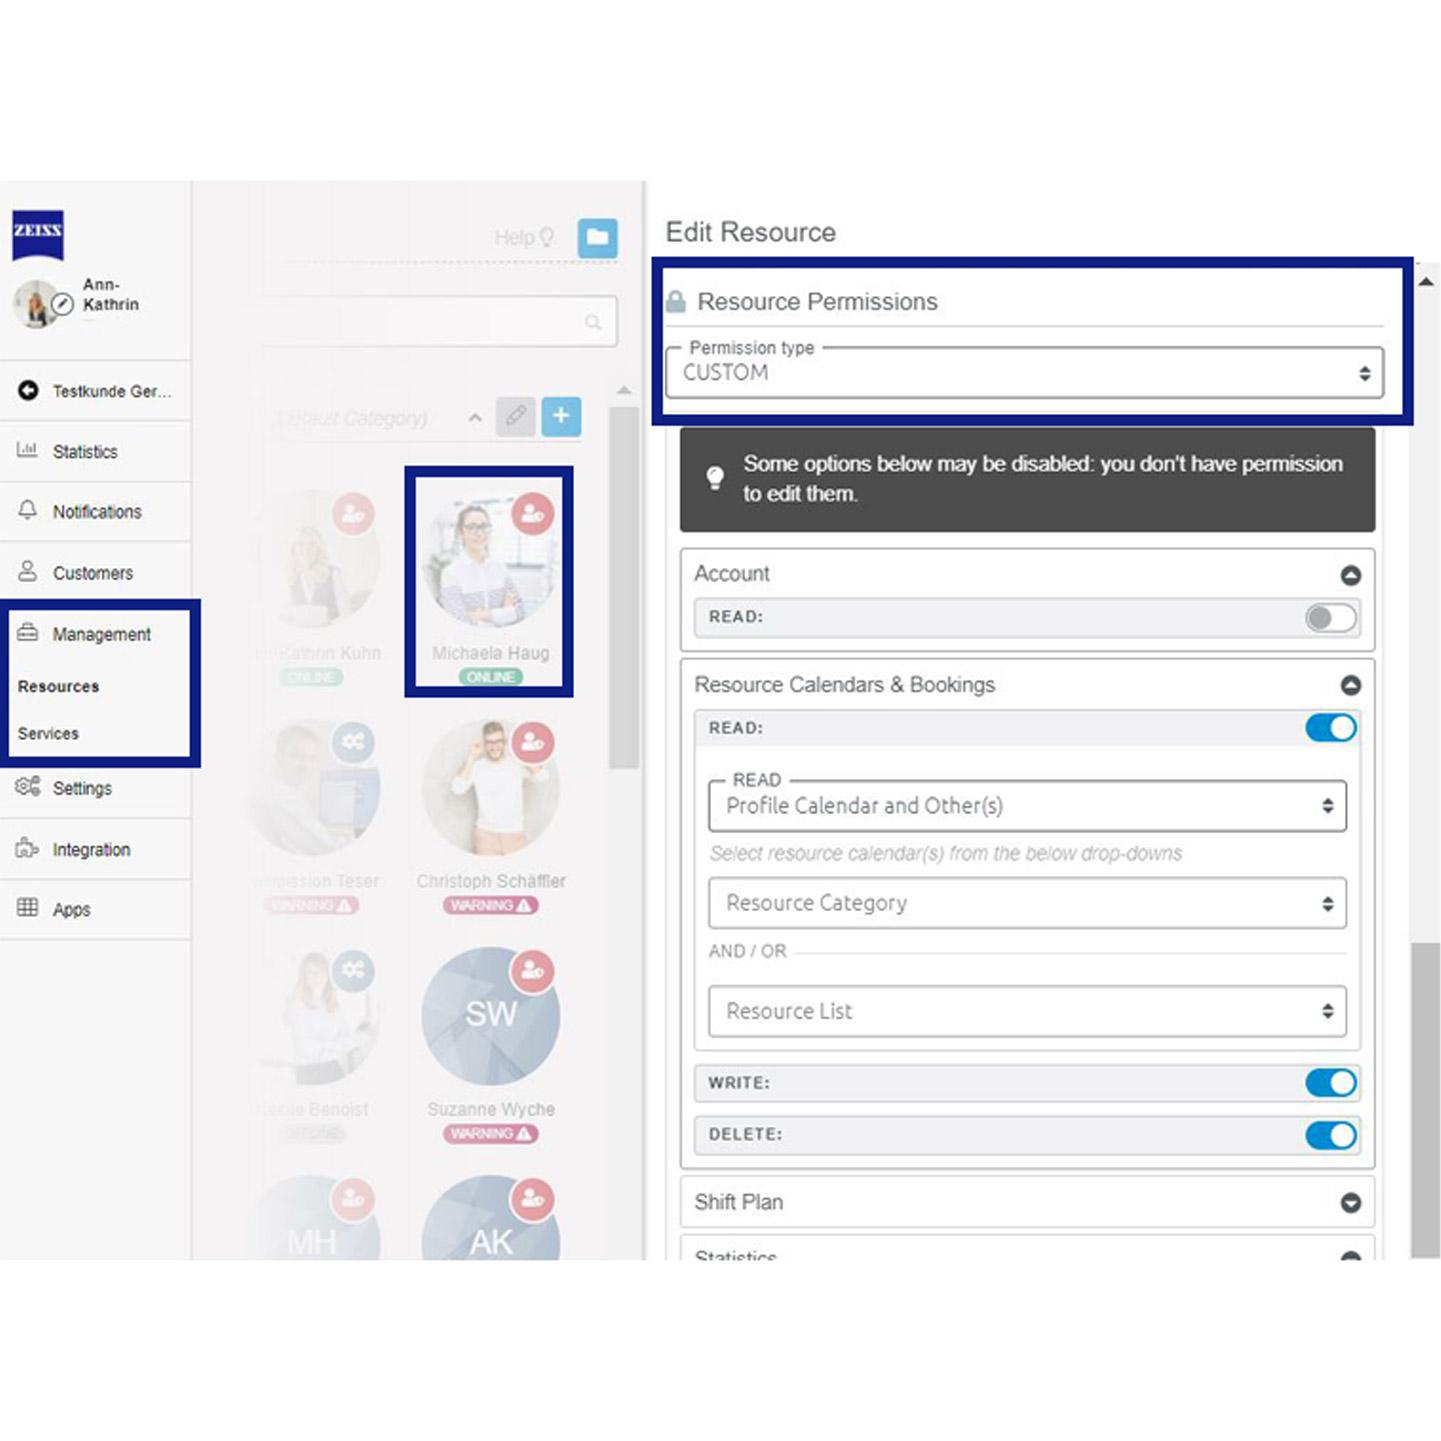
"Custom" permission rights
The basic permissions which can be customised for each employee along the following dimensions:
Account
It grants the resource access to "READ" the information in the details section from account tab on the main menu.
Calendar and bookings
Allows the resource to "READ", "WRITE" and "DELETE" the calendar and bookings on their calendar. You can also allow the resource to have access to the calendar of other resources and bookings. In the drop-down menu, as seen on the image, you have the option to choose a category or a specific resource.
Shift plan
You can allow the resource to "READ", "WRITE" or "DELETE" anything in the shift plan.
Statistics
Resources can "READ" the information in the statistics tab from the main menu.
Notifications
Give the resources the option to "READ" the email status and the activity log from the notification tab in the main menu.
Customers
Allows the resource to "READ", "WRITE" or "DELETE" the users from the customer list under the customers tab in the main menu.
Resources
It gives access to see the resources section under the management tab.
From the drop-downs, define if access should be given to all resources or the "profile" resource (i.e., the resource to whom you allocate the permission type from its profile) and/or other resources – which you can select via category or individually.
Services and groups
Allow the resource to "READ", "WRITE" or "DELETE" the "Services and group bookings".
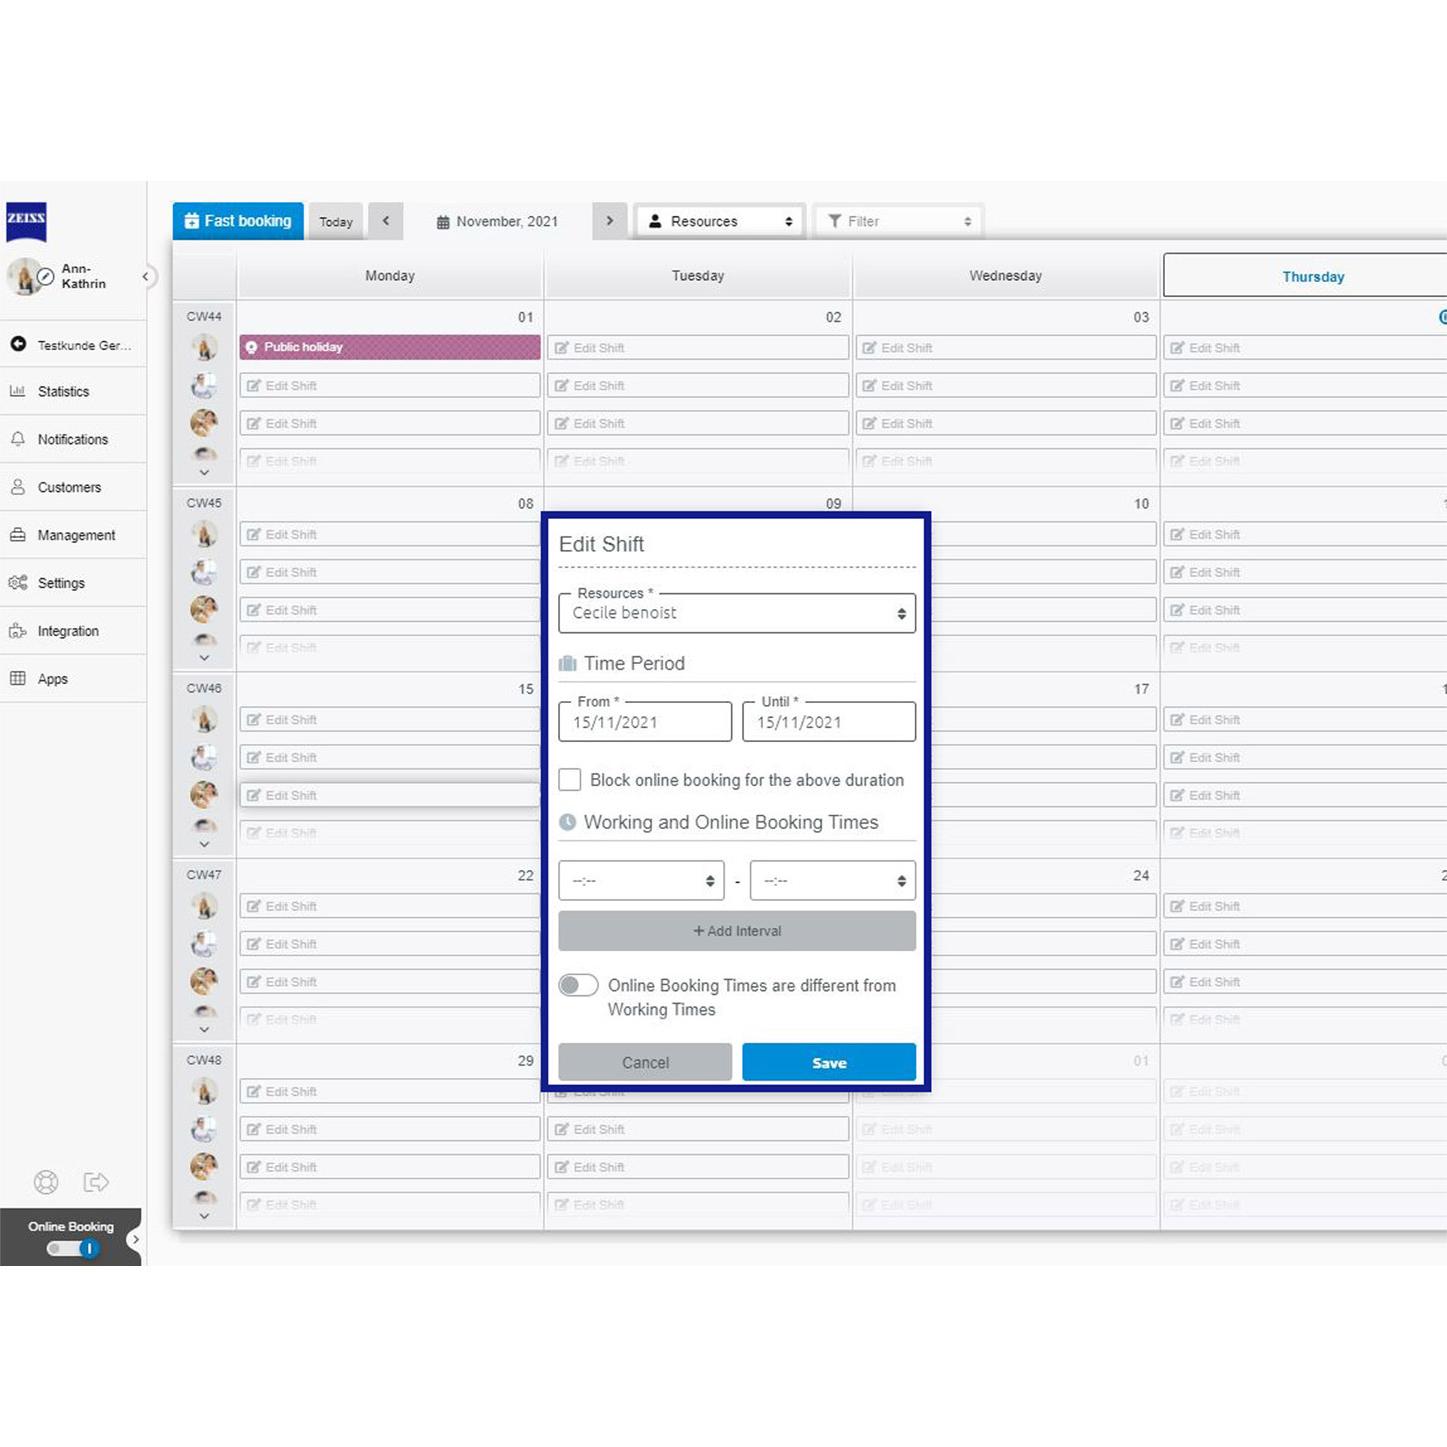

How to create flexible working and booking times
Using the pen button, you can define flexible working times in the shift plan for the selected employee.
Here you can select the period for which different working & booking times should apply and enter these accordingly. Optionally you can add intervals. After activating the slider, you can, if you like, also define whether the online booking times should differ from the working times.
Don't forget to save your defined flexible working hours.
IMPORTANT! As soon as you have created working and booking times in the area "Management" >> "Resources", these are automatically applied for each following week. The shift plan is based on this profile. If irregularities need to be corrected, then go into shift plan. Is this like a specific time frame for booking or working? That may be relevant to mention as well, for example, if you want to open a specific time frame via the shift plan for a certain event, you must define these times via the shift plan and not via the employee profile.